Company Profile - Accounting Profile
This article will cover the Accounting Settings for the Customer Company Profile
Where to find it
Click on the customer's tab, select Companies, and click on the customer's name, which will help you access the customer's profile and locate the "Edit accounting profile" option.


Tax number
Add a tax number if you require this for reporting purposes. You can use a system tag in custom reports to generate a report with this information.
Credit Status
Keep records of the customer's credit status:
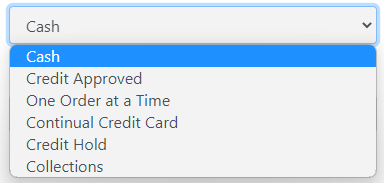
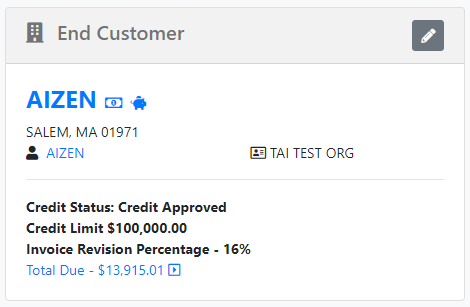
The status will be available on the shipment creation page along with the credit limit for you to review before saving it.
Continual Credit Card is a special status to automate Credit Card Payments if you have integrations with Authorize.net or Global Payments. This is connected with the invoice automation method, so you can let the system know when to process the payment.
Payment Terms
Set the customer's payment terms so the system can calculate when an invoice is past due.
Invoice Delivery Instructions
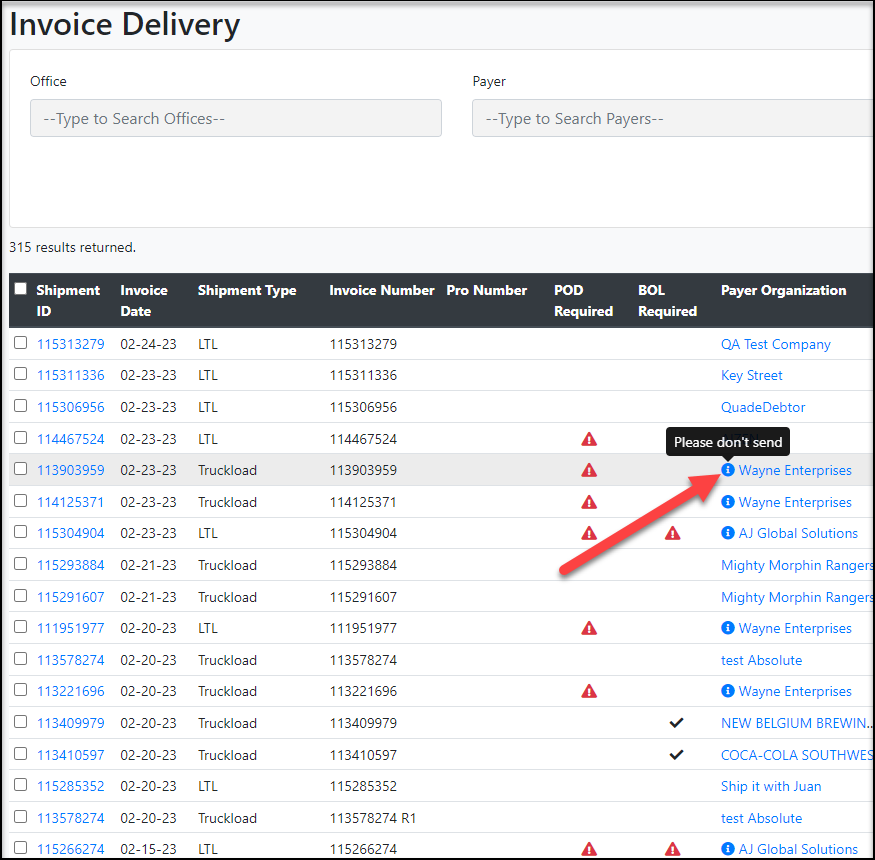
Add relevant information about how the invoice should be sent to the customer; this will be available on the invoice delivery screen by hovering over the blue information icon next to the payer organization.
Preferred Invoicing Method
Every time you create a customer, the default invoicing method (which is how you want to deliver the invoice) will be emailed, but you can select from the following options:
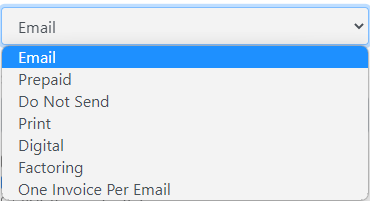
Print: This will help you track those customers who require you to send them a physical invoice. You can download a PDF from the invoice delivery screen to print it afterward.
Digital: This is for customers who are utilizing our Invoice-related API webhooks to receive Invoices or customers who have worked with our Integration Team to be set up to receive Invoices via EDI 210.
- This setting is not required for API Webhooks to function, it only adds a 'Generate Digital Invoice' button to be available if retriggering is needed.
Factoring: This is connected with factoring company integrations such as Triumph Business Capital, Haul Pay, and Denim. This will inform the system that you will be factoring invoices instead of following the standard accounting workflow.
One invoice per email: Allows the customer to receive an invoice per email when sending multiple invoices. If you have your invoicing method as email and send multiple invoices, the system will group them into one PDF file and send one email.
Invoicing Automation Method
Allows you to set up whether you want your customer to have automatic invoicing.

Manually invoice is the default method, which means you want to create the invoice yourself every time.
Auto Invoice at Delivery automatically generates and sends the invoice when the shipment reaches the delivered status.
Auto Invoice at Billing automatically generates and sends the invoice when the carrier bill is approved.
Auto Invoice at Committed automatically generates the invoice when the shipment reaches the Committed status.
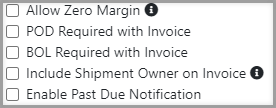
Note: If POD or BOL Required with Invoice are checked off, the auto Invoicing functionality will not take effect because of those requirements. Also, shipments must pass auto-validation rules.
To learn more about auto-validation rules, please click HERE.
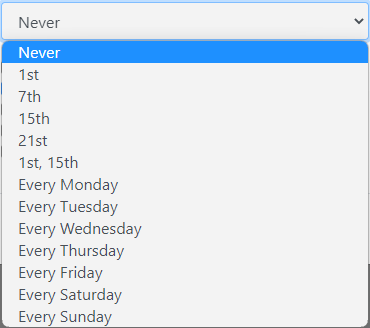
Statement and Collections Notice Delivery Frequency
Set which days you want the statements and collection notices to be delivered automatically.
Statement Email Delivery
Statement emails are sent to the following recipients:
-
Customer users who have Collections enabled under Notification Settings
-
The Company Invoice Email, if one is configured
These recipients are independent. The user email does not need to match the Company Invoice Email. If both are present, statements are sent to both.
What Triggers a Statement Email?
Statement emails are generated automatically when all of the following conditions are met:
-
The company has one or more invoices with an outstanding balance
-
At least one valid recipient exists (user with Collections enabled and/or Company Profile Invoice Email)
Statements are not sent on a fixed daily schedule if there is no outstanding balance.
Collections Notice Emails
Collections notices are sent to:
-
Customer users with Collections enabled under Notification Settings
-
The Company Invoice Email, if configured
These recipients are independent and do not need to match.
What Triggers a Collections Notice?
Collections notices are sent automatically when:
-
The company has overdue or outstanding invoices
Collections notices are not sent if there is no outstanding balance or if delivery frequency is disabled.
Collection Sales Rep
This feature allows you to assign a specific Collections Rep to each customer. The assigned Collection Rep can be later used to filter in the Collection Summary page to find customers by the assigned Collection Rep.

Only reps with who have AR Collections Permission can be selected.
For further information on Collection Reps and how they work within the Collection Summary page, click HERE.
Invoice Requirements and Settings
 |
|
Add Invoice Template
This feature enables you to customize invoices for each individual customer.

Selecting this option will guide you to a page where you can create a customized customer invoice from scratch.
Copy the source code from the EMAIL Invoice HTML content template and paste it into the custom invoice template source code. This will provide you with a starting point to make any necessary adjustments that meet your customer's invoice requirements.

This feature also enables customization of email subject lines for each customer. Click HERE to find out how.
