
Table of Contents
Integration Setup
-
License Key: HaulPay will provide a License Key, which you will use to create the integration.
-
Data Sharing: The Tai Support team and the HaulPay onboarding team will perform an initial data-sharing exercise.
-
Customer & Carrier Imports:
-
Carriers and Customers may need to be imported into the TMS.
-
Tai Support can provide customer and carrier import files for these scenarios.
-
Important: HaulPay identifies customers best when a Customer Tax ID is present in the TMS. This is recommended (but not required).
Workflow Overview
Once the integration is established, ongoing management involves:
-
Carrier Relationships – Linking carriers between Tai and HaulPay.
-
Debtor Relationships – Linking customers (debtors) between Tai and HaulPay.
-
Factoring Management – Syncing loads, invoices, line items, and attachments.
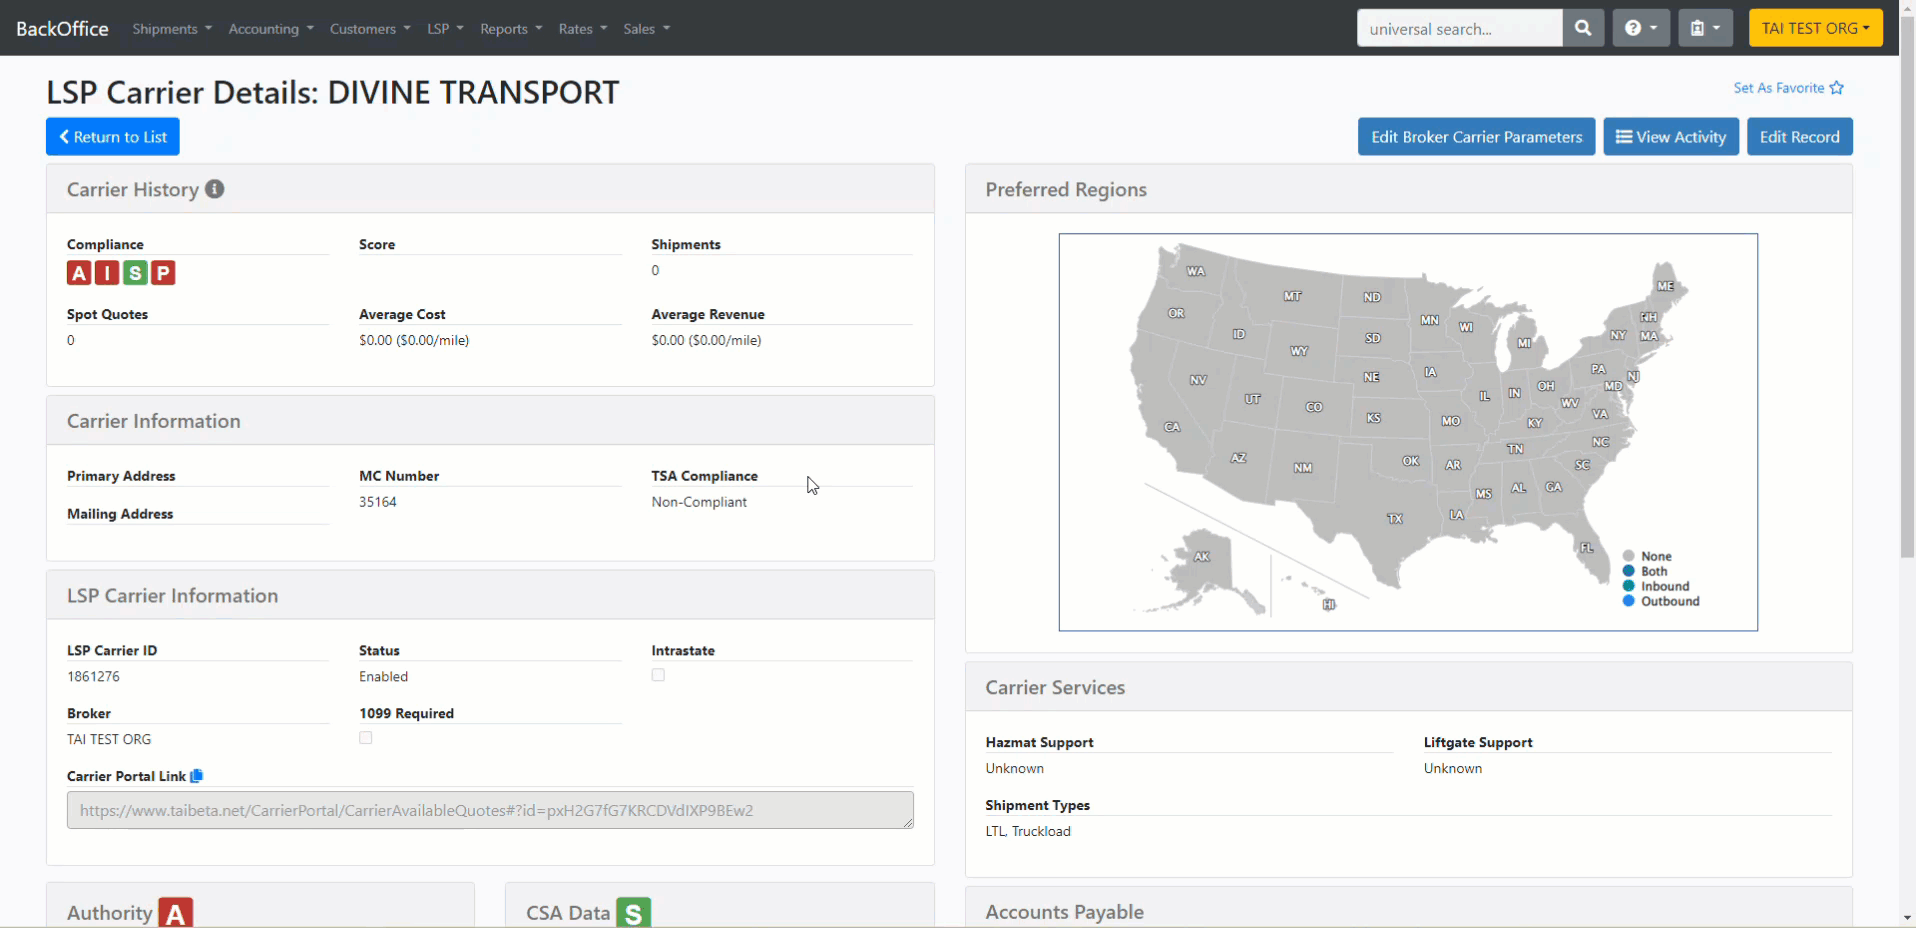
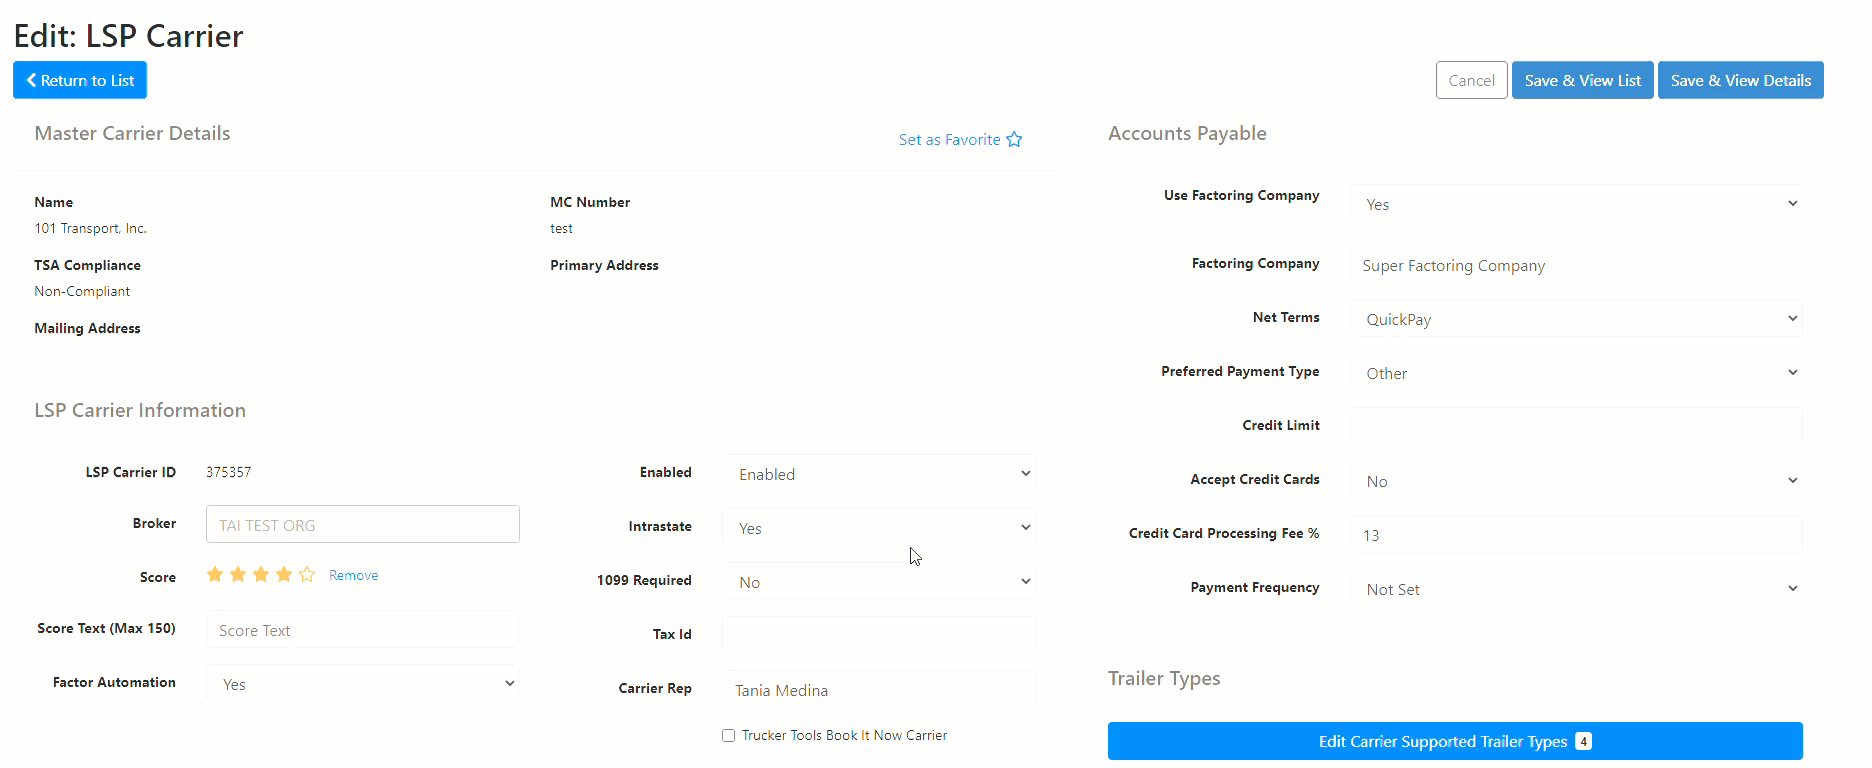
Create a Carrier Relationship
-
Open the LSP Carrier profile.
-
Click Edit Record.
-
Set Factor Automation to Yes.
The system will attempt to match the carrier using the MC number in HaulPay.
-
✅ If successful: The relationship is created automatically.
-
❌ If unsuccessful:
-
You can still factor shipments, but you must:
-
Create the carrier manually in HaulPay.
-
Ensure it is approved.
-
In Tai TMS, toggle Factor Automation to No, then back to Yes to rebuild the relationship.
-
-
Delete a Carrier Relationship
-
Switch Factor Automation to No.
-
A green notification will confirm the deletion.
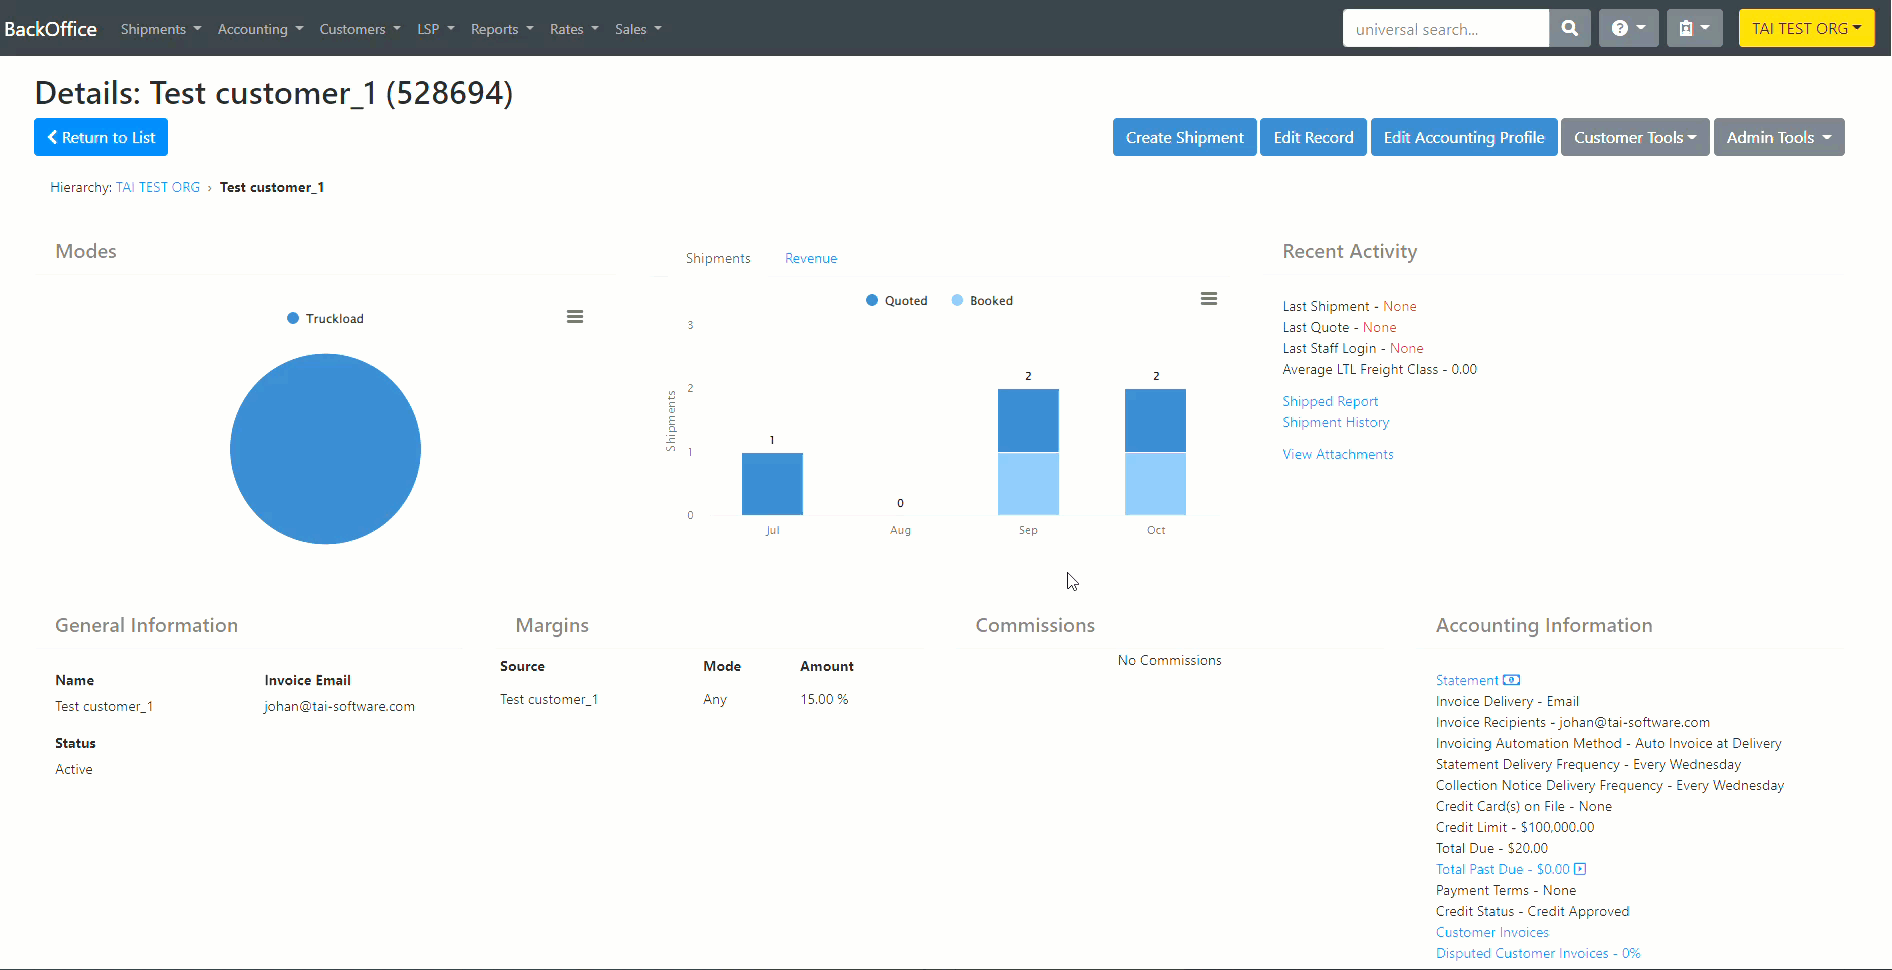
Create a Debtor Relationship
-
Open the Customer profile.
-
Click Edit Accounting Profile.
-
Set Preferred Invoicing Method to Factoring.
-
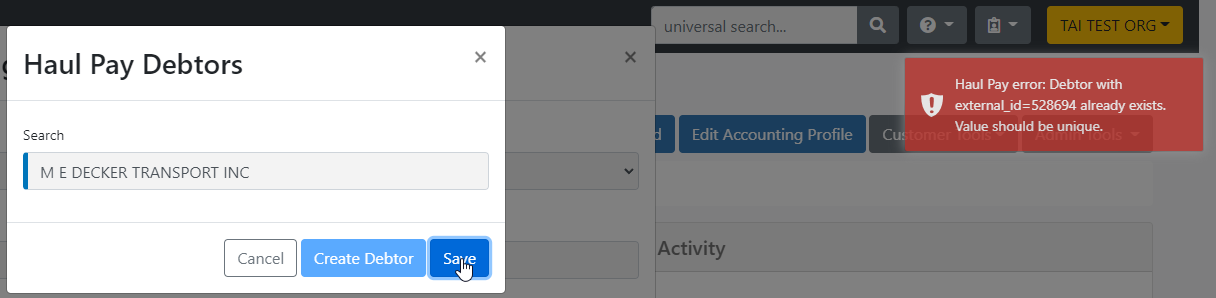
The HaulPay Debtors modal will open.
-
Select a Debtor from the list, then click Save.
-
Click Update in the Accounting Profile (do not close without saving).
⚠️ Warning: If you do not hit Update, the invoice method will revert to the last saved option.
-
To create a new Debtor, you must use HaulPay’s site directly.
-
When you save, the system checks existing relationships via
debtor_relationships_list.-
If a match exists → an error notification will appear.
-
If no match exists → a new relationship is created using
debtor_relationships_create.
-
Delete a Debtor Relationship
-
Change Preferred Invoicing Method to anything other than Factoring.
-
Optionally, switch it back to Factoring and select a new Debtor if needed.
-
Always click Update in the Accounting Profile.

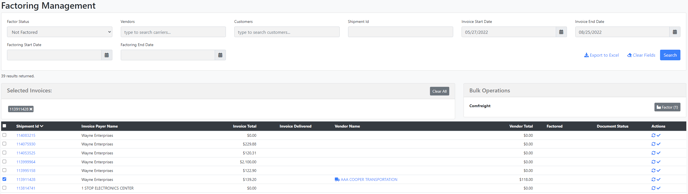
Factoring Workflow
Factoring is managed on the Factoring Management page, under Bulk Operations.
The system sends the following to HaulPay in order:
-
Load – Requires street addresses, pickup/delivery times.
-
Invoice – Invoice Total and Vendor Total.
-
Line Items – Accessorial charge lines.
-
Attachments:
-
Proof of Delivery (POD – Signed BOL Delivery)
-
Invoice
-
Rate Quote Sheet
-
- Reference Number – PO Number (if available)
📌 Note: HaulPay only requires the POD to factor shipments.
-
If the POD is attached, you will see a checkmark in Document Status.
-
Additional documents are sent automatically if uploaded before factoring.

Success Indicators
When factoring succeeds:
-
The invoice is marked Factored with today’s date.
-
A message is logged in the Shipment Activity Log.
-
The invoice number returned from
broker_invoices_createis saved asShipmentReferenceType.InvoiceNumber
Error Handling
During factoring, if any step fails:
-
Load creation (
loads_create) fails-
Workflow stops.
-
An Accounting Sync Exception alert is added to the shipment.
-
Errors are logged in the Shipment Activity Log.
-
-
Invoice creation (
broker_invoices_create) fails-
Workflow stops.
-
An Accounting Sync Exception alert is added.
-
Errors are logged.
-
-
Line item creation (
line_items_create) fails-
Workflow continues.
-
Failure is logged as an additional message.
-
-
Attachment upload (
broker_invoices_attachments_create) fails-
Workflow continues.
-
Failure is logged as an additional message.
-
Verification: Load Import
If a load import succeeds but the broker invoice fails:
-
The system checks via
loads_listto see if the load already exists in HaulPay. -
If yes → the load import is skipped.
-
The process resumes at invoice creation.
Best Practices
-
Always include Customer Tax IDs when possible.
-
Remember to hit Update after editing Accounting Profiles.
-
Attach the POD before factoring; it is the only required document.
-
Use HaulPay’s site to create new Carriers or Debtors when they do not exist.
HaulPay Wallet
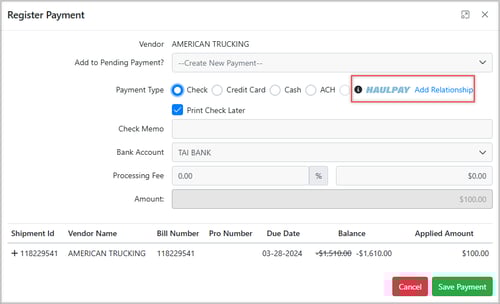
The HaulPay Wallet allows you to pay carrier invoices directly within the Pay Bills screen, using funds from your HaulPay account. This feature enables you to manage carrier payments more efficiently and seamlessly in the TMS.
How It Works
-
If your organization already has the HaulPay integration, you’ll see the HaulPay Wallet option in the Pay Bills modal.


-
If you don’t have a HaulPay Wallet yet, you’ll still see the option, but it will be disabled. A link will be provided to start the onboarding process with HaulPay.

Ready to get started? Begin your HaulPay Wallet onboarding by clicking HERE.
-
When enabled, you can select HaulPay Wallet as your payment method and confirm payment just like you would with other options.
Bill Eligibility
-
Factored Bills:
-
Factored bills will remain visible in the Pay Bills page but cannot be paid through HaulPay Wallet.
-
Attempting to pay these bills through HaulPay Wallet will result in an error indicating the payment could not be processed.

-
-
Carriers Not Available in HaulPay:
-
If the carrier exists only in Tai (not in HaulPay), the HaulPay Wallet option will be grayed out.
-
You will see a message such as: “Carrier Not Available in HaulPay Wallet.”
-
-
Carriers in Both Systems but Not Yet Linked:
-
If the carrier exists in both Tai and HaulPay but has no established relationship, the HaulPay Wallet option will be grayed out.
-
In this case, you’ll see an option to create the relationship between Tai and HaulPay directly from the modal.
-
-
-
Once the relationship is created, you can select the HaulPay Wallet option to pay the bill.
-
-
Eligible Bills:
-
All other bills with valid carrier relationships can be selected for payment with HaulPay Wallet.
-
Paying a Bill
-
Go to the Pay Bills screen.
-
Select the bills you’d like to pay.
-
Choose HaulPay Wallet as the payment method.
-
Review the details, including:
-
Available Funds (shown in the modal)
-
Remaining Balance (after the selected payments are applied)

-
- Click Save Payment to complete the transaction.
Mapping a Bank Account to HaulPay Wallet
When using HaulPay Wallet for payments, you need to configure which of your bank accounts will be used for processing. This ensures that all HaulPay Wallet payments are automatically linked to the correct account in your GL Accounts.
Configuring the Bank Account
-
Go to Integration Sources in the TMS.
-
Select your HaulPay integration source.
-
Add the setting AccountName.
-
The value you enter must exactly match the Bank Account name listed under your GL Accounts.
-
-
Once the AccountName is set, the mapped bank account will be used for all HaulPay Wallet payments.
-
The selected account is recorded in the payment details.
This setup ensures consistency and removes the need to manually select a bank account when processing payments through HaulPay Wallet.
What to Expect After Payment
-
Payments made with HaulPay Wallet follow HaulPay’s standard payment schedule.
-
If your Wallet has enough funds, the bill will be marked as Paid.
-
If your Wallet does not have enough funds to cover the full amount, the bill will remain Unpaid (HaulPay does not process partial payments).
-
A confirmation message will appear once the payment is successful.