Table of Content
- Summary
- Create Invoice - Shipment Details Page
- Create Invoice Page
- Modifying the Invoice Content Template
- Invoice Pay Now Feature
Summary
Generating an invoice marks the initial step in the Accounts Receivable process. This can be accomplished from various sections of the TMS and can occur at any point throughout the shipment lifecycle. We will outline the invoice creation process from different areas within the TMS.
Back to TopCreate Invoice - Shipment Details Page
Navigate to the menu at the top right, then go to the Accounting tab and select "Create Invoice."

Upon doing so, a modal window will appear, allowing you to choose the invoice date before finalizing the creation of the invoice. You can select from three options: the Pickup Date, Delivery Date, or Today's Date.

Once the invoice has been generated, it will be automatically linked to the corresponding shipment in the document manager for easy access and reference.

Create Invoice Page
An alternative method for creating an invoice is to navigate to the Create Invoice Page, found under the Accounting menu, by selecting Accounting and then Create Invoice.

The main difference between creating an invoice from the shipment details page and the create invoice page is that from the create invoice page, users can generate invoices in bulk and review additional information across all shipments from the results column.

POD and BOL Required
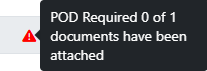
A red warning triangle icon will indicate shipments that lack the required Proof of Delivery (POD) and Bill of Lading (BOL) documents, as specified in the customer's accounting profile settings. Once you attach the necessary BOL or POD, the red warning icon will be replaced by a black check mark, signaling that the documents are now complete.

To learn more about the customer Accounting Profile, please click HERE.
Edit Pricing
Pricing adjustments can be made directly from this screen by selecting the Sell Amount, which will open the edit pricing modal for your convenience.

Creating Invoices in Bulk
- You can create multiple invoices simultaneously by selecting the appropriate checkboxes. When generating invoices from this screen, you have the option to choose the creation date from a dropdown menu located next to the "Approve and Create Invoices" button.
- Invoices that contain discrepancies can be transferred to the variance list by clicking the "Move to Variance List" button.

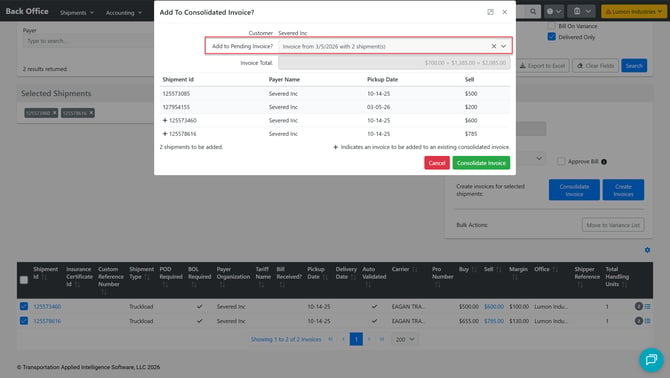
Creating Consolidated Invoices
- You can create Consolidated invoices simultaneously by selecting the appropriate checkboxes. When generating invoices from this screen, you have the option to choose the creation date from a dropdown menu located next to the "Consolidate Invoice" button.
Once an invoice has been consolidated, you can add more invoices to that existing consolidated invoice.
To do this, the consolidated invoice must:
-
Be unpaid
-
Not have been sent
When these conditions are met and you attempt to consolidate invoices again, a modal will appear allowing you to select from a list of eligible consolidated invoices to which you can add additional invoices.
Column Customization
To customize the columns in the search results, select the Gear Icon to open the Column Customization modal.

- Select an item's checkbox from the Available Columns list to add a column.
- To delete a column, click the X on the item from the Selected Columns list.
- Drag and drop items under the Selected Columns list to reorder columns.
- To undo your changes, select Revert to Default.

Modifying the Invoice Content Template
Contents of an invoice, such as formatting, text, reference numbers, etc., can all be modified in the content template for "EMAIL Invoice HTML." More information on editing content templates can be found in the following article: Content Templates
Back to TopInvoice Pay Now Feature
For customers using the Global Payments payment gateway, you can use the following code snippet to add a "Pay Now" button to the Invoice. This is visible in the browser and also works in the PDF that is generated.
This link allows customers to see a button to click to pay an invoice and authorize payment using ACH and Credit Card Payment methods. When using this option, the payment is automatically registered in the TMS.
