Overview
The AR Variance List is a dedicated page within the TMS where shipments can be placed for review before they are invoiced. This tool is especially useful for shipments that may have a negative margin, no margin, or simply require additional review due to pricing discrepancies or unusual circumstances. By moving shipments to the AR Variance List, users can ensure greater accuracy and accountability in their invoicing process.
Accessing the AR Variance List
To access the AR Variance List, navigate to the Accounting section in your TMS and click on Variance List. This page is structured very similar to the Create Invoices page. The main focus on this page is to review the shipments you’ve placed on the Variance List for further evaluation.
If you're unsure how to move shipments to the Variance List, be sure to check out the instructional article on Creating Invoices.

Page Layout
The Variance List page looks and functions similarly to the Create Invoices page. By default, it is set to show delivered shipments only.

Key Features

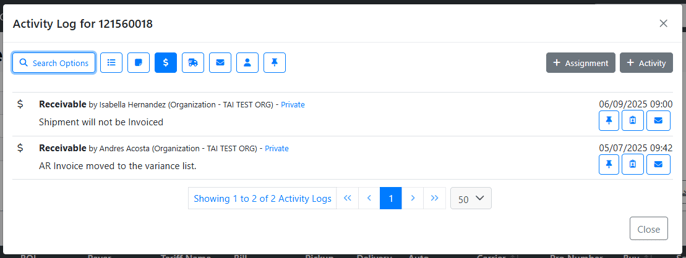
- Activity Log
- Edit Pricing

The Edit Pricing page allows you to modify Linehaul and Fuel charges, as well as add accessorials or other charge lines by clicking the blue + Add Charges button.

When you click the + Add Charges button, dropdown lists for Accessorials and Charge Lines will appear, allowing you to select the appropriate charge. You can then enter the corresponding Sell Amount and Quantity for each item.

How to Remove a Shipment from the Variance List
1. Resolve Variance (Move Back to Create Invoices)
Use Resolve Variance to return shipments from the AR Variance List to the standard Create Invoices page after a variance has been reviewed.
This action updates the shipment’s charge lines and removes the shipment from the Variance List without creating an invoice.
Steps
-
Select one or more shipments by checking the corresponding checkbox on the left.
-
Open the Bulk Operations card.
-
Click Resolve Variance.

Result
-
Charge lines are updated from Has Variance to Ready
-
The shipment is removed from the AR Variance List
-
The shipment becomes available on the Create Invoices page
When to use this option
-
The variance has been reviewed, and no changes are required
-
The shipment was placed in variance unintentionally
-
The shipment should be invoiced later with other shipments
2. Invoice the Shipment
This adds the shipment back into the invoicing workflow.
Steps:
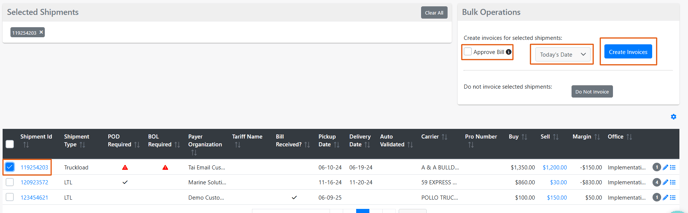
- Select the shipment using the checkbox to the left of the row.

- Go to Bulk Operations and choose an Invoice Date (Pick up Date, Delivery Date, or Today’s Date).

- Click Create Invoice.
Optional: You can also approve the bill during this step if needed.
You can locate the finalized invoice by navigating to the Accounting tab and selecting Invoice Search.

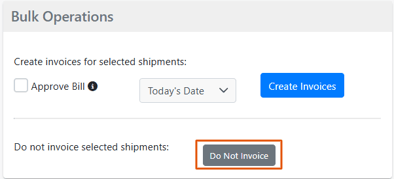
3. Do Not Invoice
This permanently removes the shipment from the accounting process.
How to:
- Select the shipment using the checkbox to the left of the row.

- Click the “Do Not Invoice” option.
⚠️ Important: This action cannot be undone. Make sure this is your intended choice before confirming. Even after using this option, you can still find the shipment using the Universal Search or Shipment Search tools, but the shipment will no longer have any accounting records.