Workflow Automation
The objective of our workflow automation tool is to help users create and set up workflows swiftly, saving time by providing built-in features that enhance productivity, foster teamwork, and streamline the process of entering shipment information.
Table of Contents
- Accessing Workflow Automation
- How to Create a Workflow
- Triggers
- Filter Form
- Special Filters
- Action Form
- Available Actions
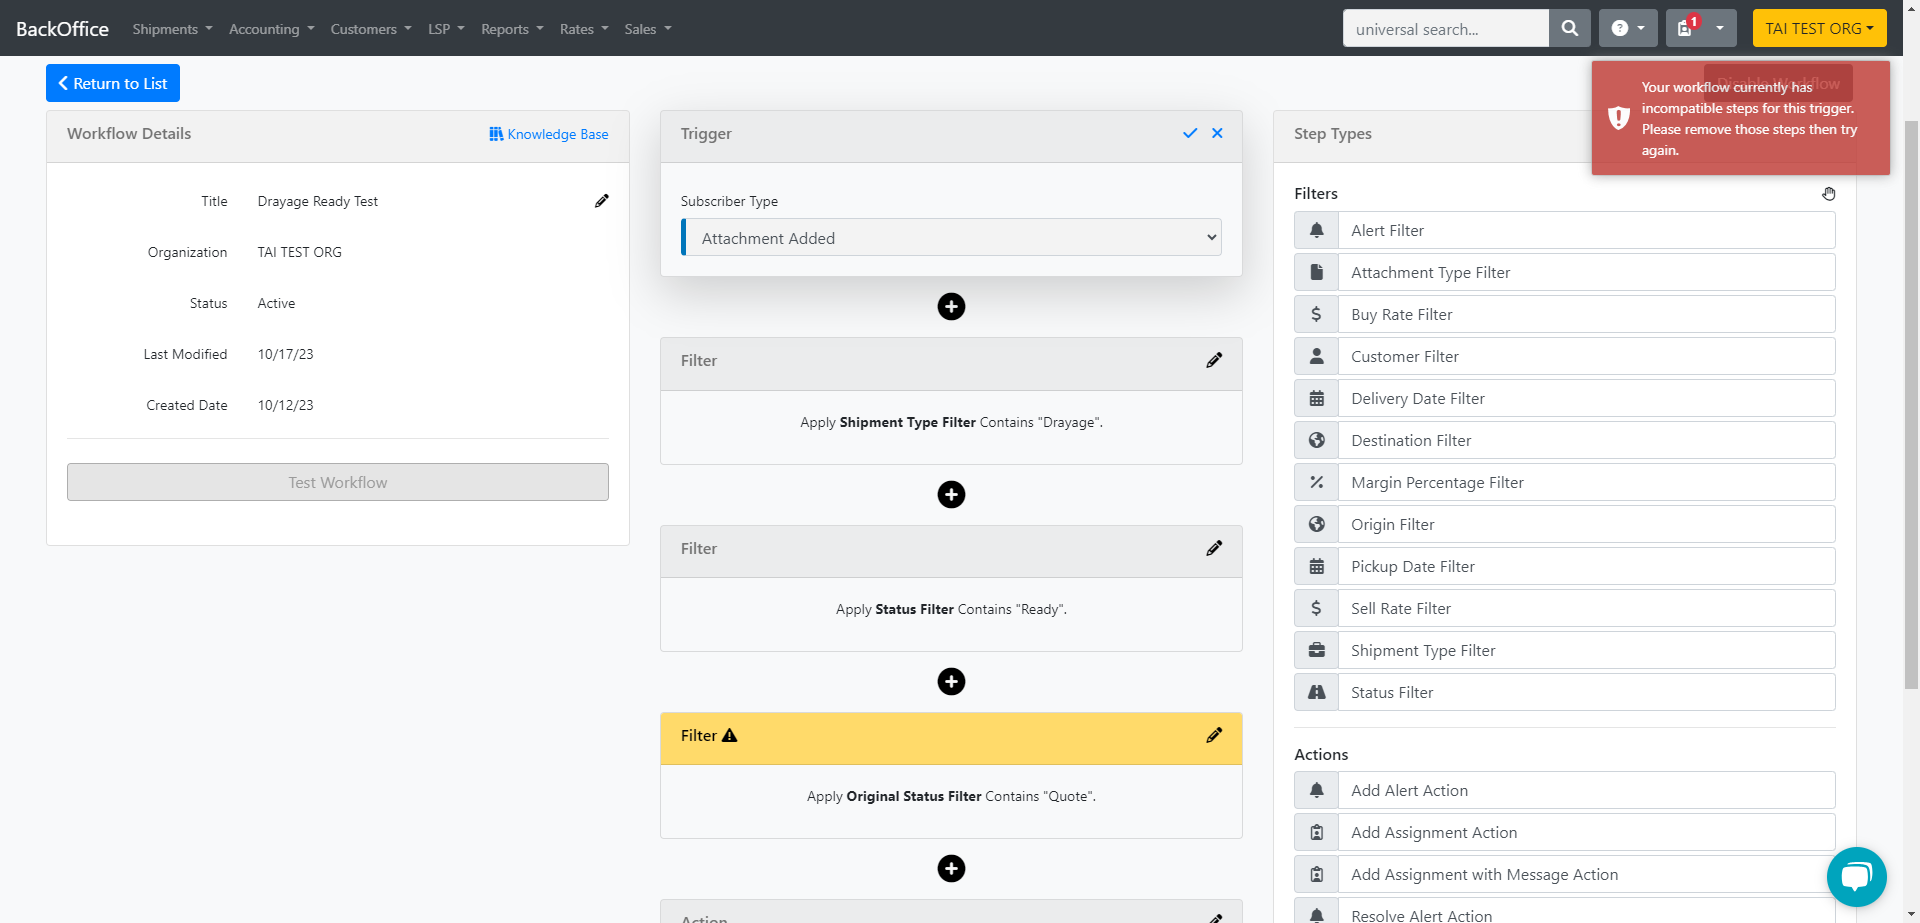
- Incompatible Triggers and Filters
- Workflow Automation Samples
 |
 |
 |
|
Accessing Workflow Automation
Navigate to the LSP tab and locate the Workflow Automation section.
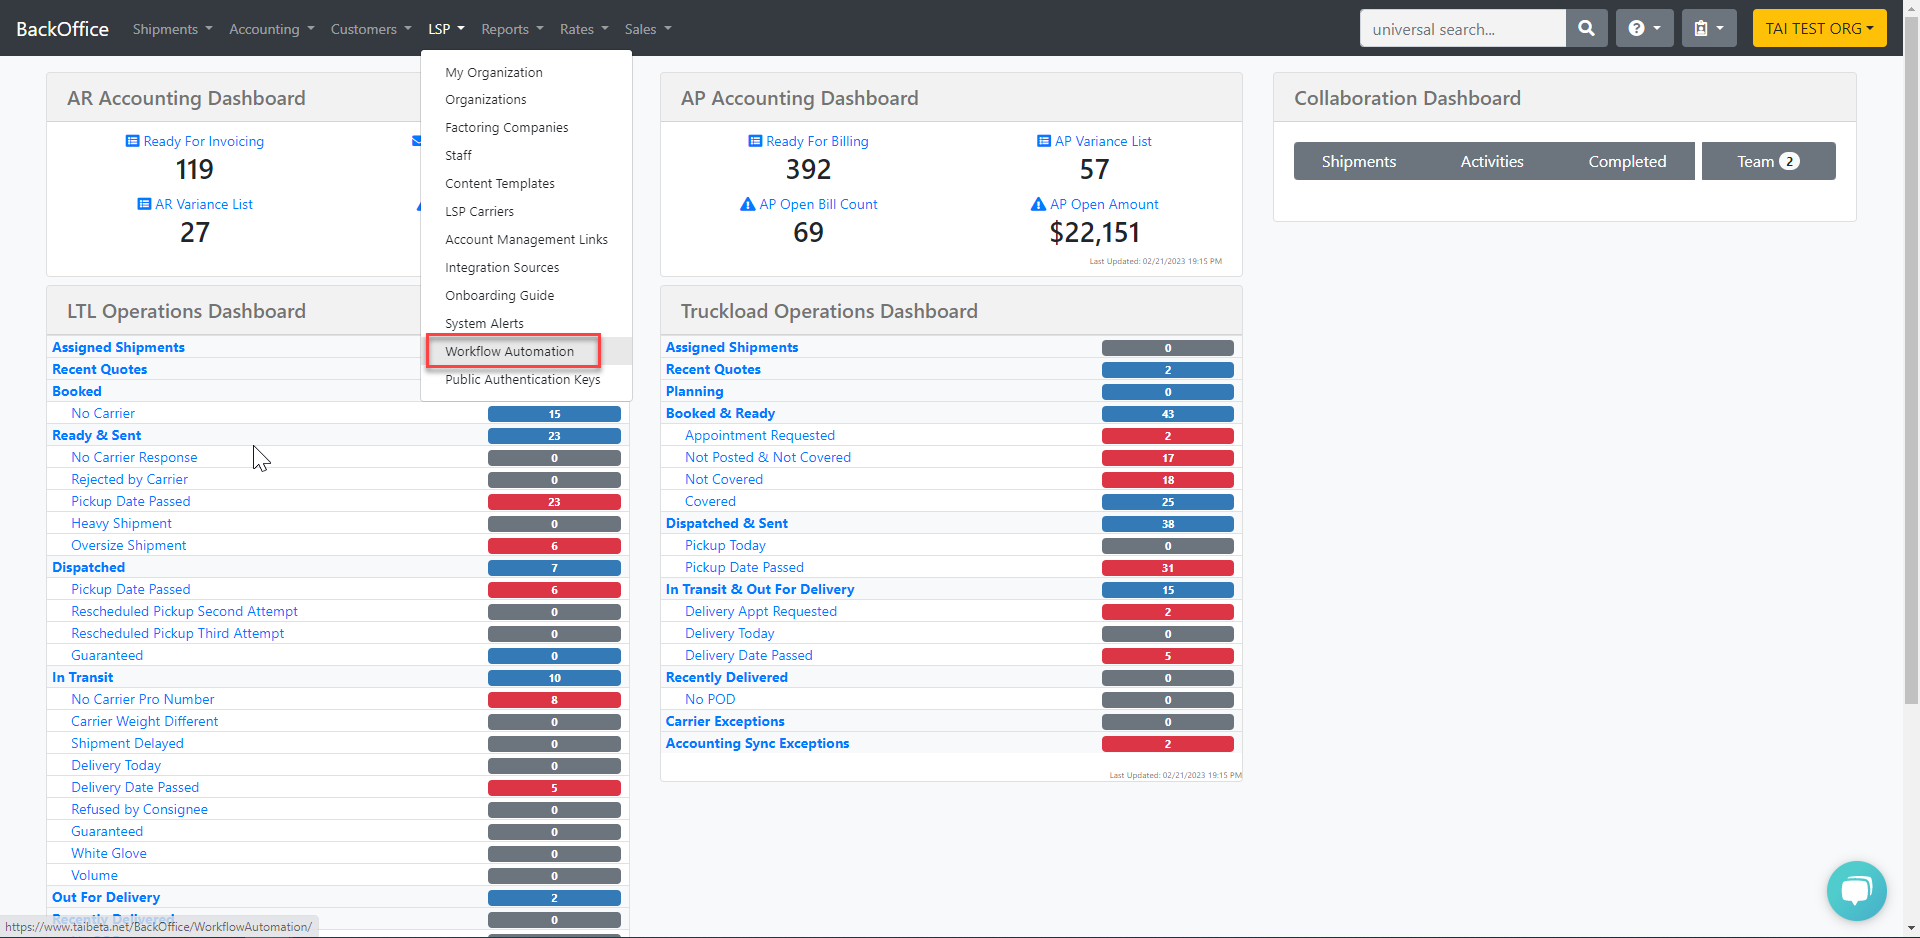
Upon accessing the tool, the initial screen will display a list of your existing workflows and the option to create a new one.


Click the blue pencil or information icon on the right to view and edit a workflow. From there, you can also duplicate or delete the workflow as needed.
Back to TopHow to Create a Workflow
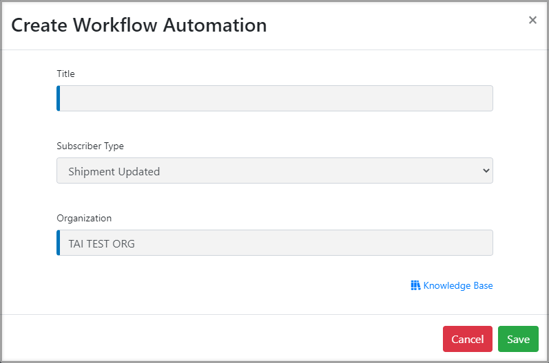
- To create a new workflow, click "Add New Workflow," which will open the Create Workflow Automation modal.
- In this modal, enter the workflow's title and choose the Subscriber type that will trigger it.
- The last step is to select the organization you want the workflow to work under and click on save.
Note:
- All Newly created workflows will be in an Inactive status. After you add filters and actions, you can activate them by clicking on Activate Workflow.
- You can only activate the workflow after you add an Action.
Triggers
- Create Shipment: The system will initiate the workflow after creating a shipment.
- Update Shipment: The system will initiate the workflow after editing and saving the shipment.
- Shipment Status Updated: The system will initiate the workflow when you update the shipment status through the check call modal.
- Add/Remove alert: The system will initiate the workflow upon adding or resolving an alert.
- Add/Update/Remove Carrier: The system will initiate the workflow based on the following guidelines:
- If no existing carrier exists and a carrier is added to the shipment, it will be recorded as "Carrier Added."
- When there is an existing carrier, but you replace it with a different one and save the shipment, it will be labeled as "Carrier Updated."
- Lastly, if there is a current carrier, but it is removed, and the shipment is saved without assigning a new one, it will be classified as "Carrier Removed."
- Assignment Added: The system will initiate the workflow after assigning a shipment.
- Attachment Added: The system will initiate the workflow after attaching a document to a shipment.
- Spot Quote Added: The system will initiate the workflow after receiving a spot quote on the Truckload Quoting page.
This excludes spot quotes that are manually added in Truckload Quoting. However, it will activate for Quote Requests sent from Truckload Quoting and any quote received from any of the DFMs.
- Shipment Scheduler: The system allows you to create a schedule for your workflows to take effect at certain times and days.
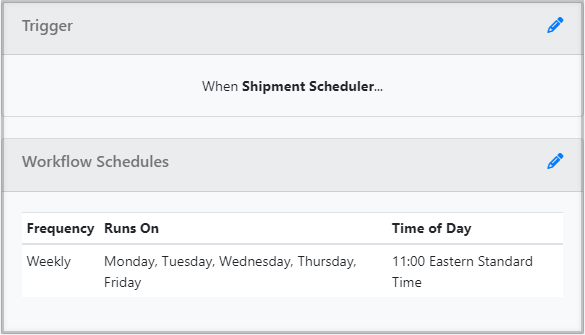
You have the option to schedule the workflows to trigger either weekly or monthly. For weekly triggers, you can designate specific days of the week for activation. If you opt for a monthly schedule, you can choose a particular day of the month for the workflows to be initiated.
Note: The shipment scheduler job operates on a 30-minute interval, meaning it does not execute at the exact time an event is scheduled. For instance, if an action is scheduled for 10:30, the job may actually run at any time within that interval, such as 10:39 or later. This interval-based schedule ensures efficient processing but may introduce a slight delay in exact timing.
- Carrier Check Call Response: The system will initiate a workflow when a carrier submits an update through the TMS's Check Call functionality.

Adding Criteria to Workflow Automation
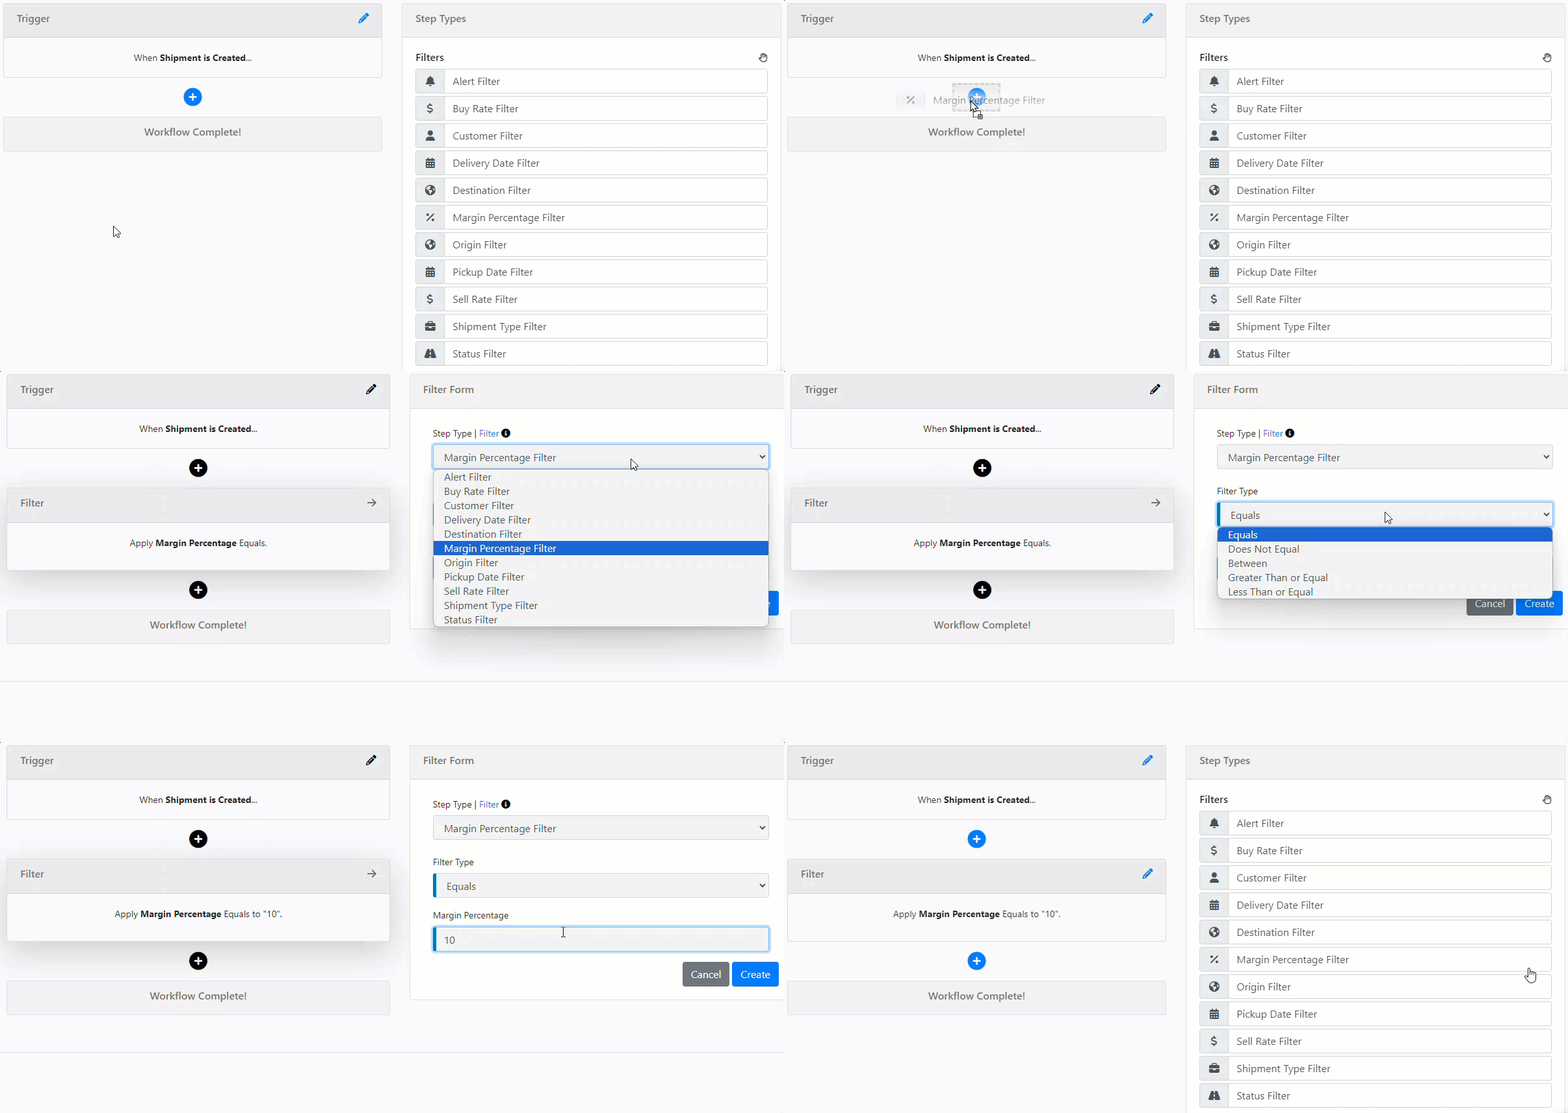
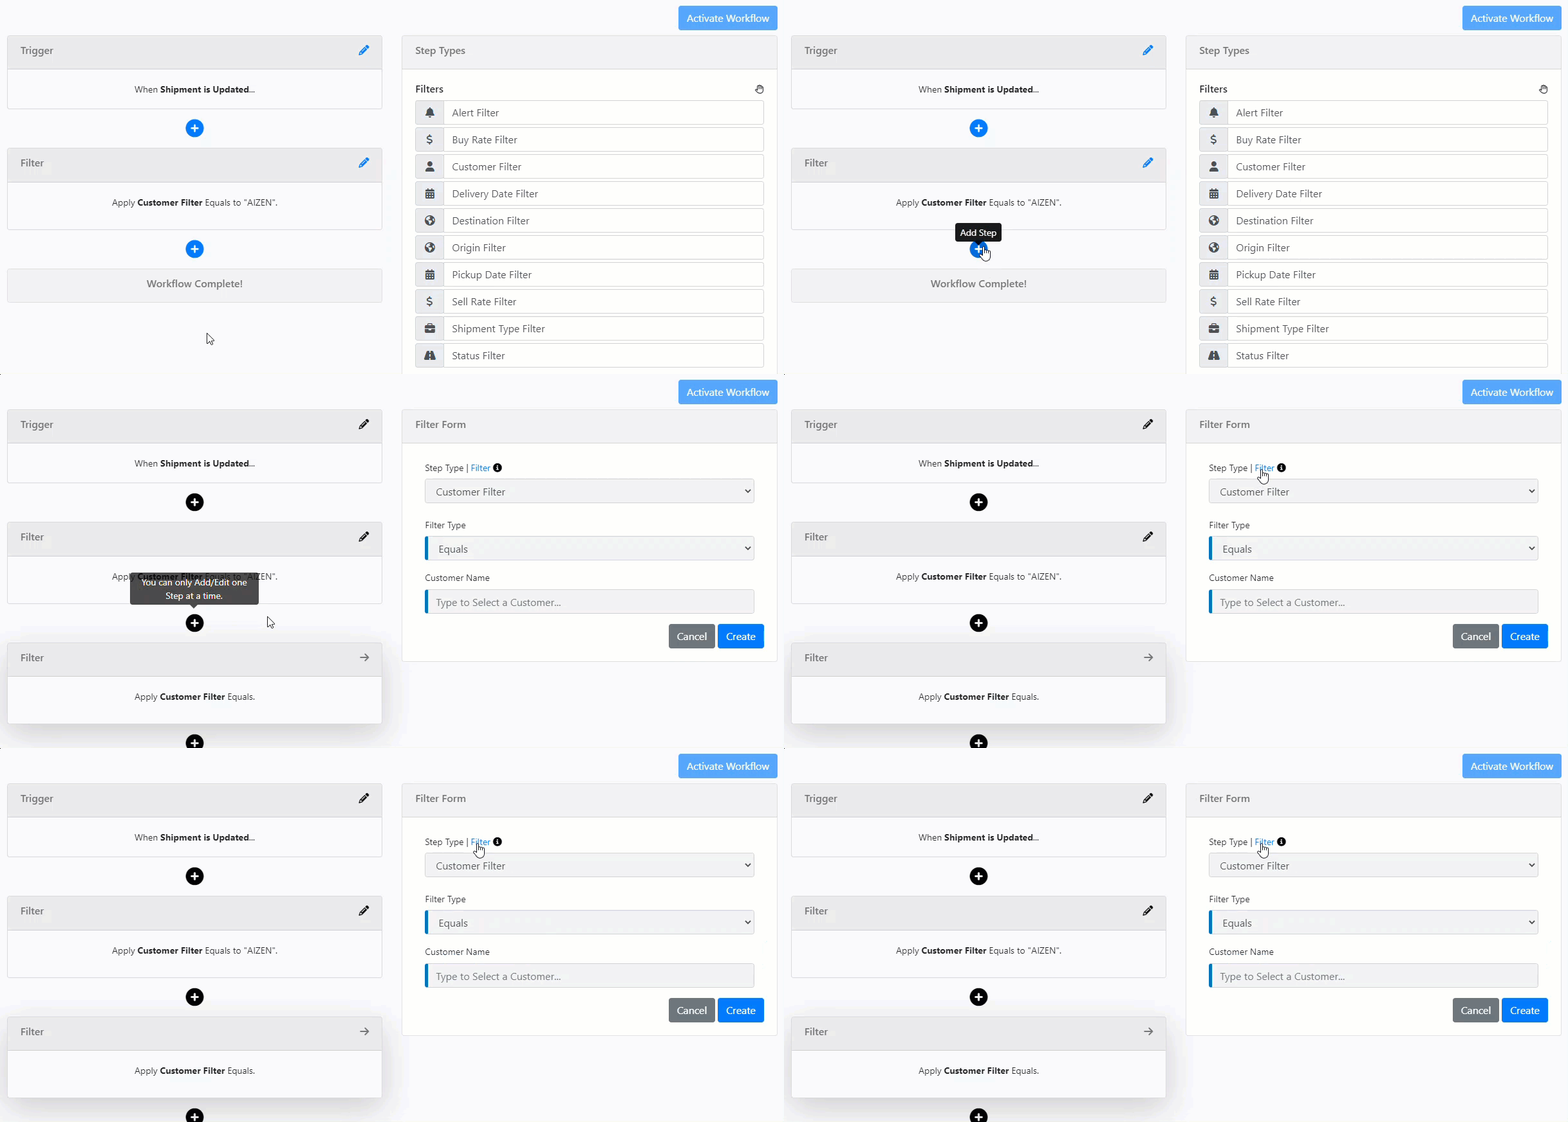
To begin creating your workflow, click the blue plus sign to add filters. Alternatively, you can drag and drop the filter steps into the plus sign, allowing the system to automatically display the selected filter.

Filter Form
Select a filter from the step type list on the right. Depending on the step type, the system will display the step filter, set the filter type, and click on Create once you are done.
Special Filters
- Original Status Filter: This filter is linked to the Shipment Status Updated trigger. By utilizing this filter, you can specify that a workflow should be activated when the shipment status changes from a particular one to a new one. The new status can be determined using the Status Filter option.
- Original Alert Filter: This filter is linked to the triggers for Alert Added/Resolved. It ensures that a workflow is only activated when a particular alert is added to a shipment. This filter works hand in hand with the Alert filter, which specifies that the alert must be present in the shipment for the workflow to be triggered.
- Example:
- The filter type "Does not Contain" in the Original Alert Filter indicates that the shipment previously did not contain the alert "Rejected by Carrier."
- The "Contains" filter type in the Alert Filter signifies the inclusion of the "Rejected by Carrier" alert. This means that the system will trigger the workflow ONLY when this alert is added to a shipment.

- Attachment Type Filter: This filter is linked to the Attachment Added trigger. With this filter, you can choose from the available shipment attachments to activate a workflow in the system.
- Pickup and Delivery Date Filters:
- Pickup Date Types
- Actual Arrival Date
- Actual Departure Date
- Appointment Close Date
- Appointment Start Date
- Pickup Close Date
- Pickup Ready Date
- Delivery Date Types
- Appointment Close Date
- Appointment Start Date
- Delivery Estimated Close Date
- Delivery Estimated Date
- Proof of Delivery Arrival Date
- Proof of Delivery Departure Date
- Pickup Date Types
-
-
Filtering by “Today”
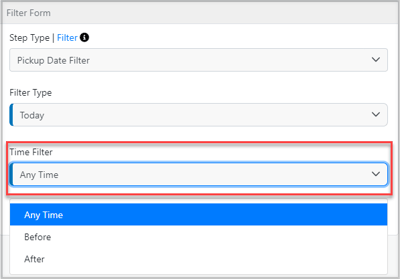
When you choose Today as the filter value, an extra Time Filter option becomes available.-
Any Time → includes all shipments where the selected date type equals today.
-
Custom Time Range → restricts results further by time of day.
-
-
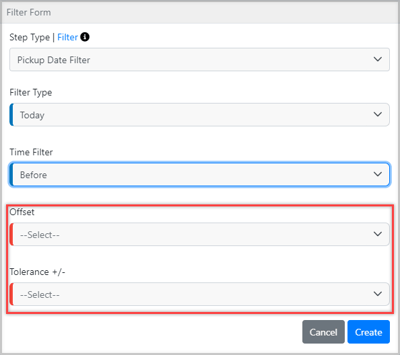
If you choose "Before" or "After," two additional fields will be activated:
-
Offset: This allows you to initiate workflows based on a specific number of hours before or after the pickup or delivery time.
-
Tolerance: You can set a time buffer for this filter, ranging from 30 minutes to 4 hours. For example, if your pickup time is 8:00 a.m. and you want the system to trigger a workflow 1 hour before the pickup time, with a tolerance level of +/—30 minutes, this means the system will start looking for shipments that meet the criteria from 6:30 a.m. to 8:30 a.m.
-
-
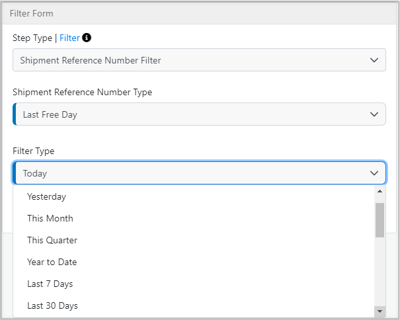
- Shipment Reference Number Filter: Customize the criteria based on the type of reference number selected. This feature supports various filter options such as string, decimal, and date filters, enabling more accurate and specific automation rules.
- When customizing criteria based on the type of reference number selected, you can choose from various filter options such as:
- Equals
- Does Not Equal
- Starts With
- Contains
- Does Not Contain
- For reference numbers Quote Due Date, Last Free Day, and Earliest Return, the filter types will be based on date filters to ensure accurate and specific automation rules are applied.
- When customizing criteria based on the type of reference number selected, you can choose from various filter options such as:
- LSP Staff Filter: This filter allows users to create automation rules based on specific LSP staff, such as Carrier Rep, Sales Rep, Created by, and Assignee.
-
The filter supports "Contains" and "Does Not Contain" logic, providing flexibility in defining automation criteria.
-
Multiple Staff Selection: Users can select multiple staff members within a single filter
-

- Pickup/Delivery Audit Missing: This filter is associated with carrier scorecards and is designed to generate notifications—either via email or through an activity log assignment—informing users when a pickup or delivery audit for a shipment is missing.

The filter is activated when all required audit questions for a shipment remain unanswered. It is associated with the "Shipment Status Updated" trigger, making it available only when this specific trigger is selected.
- Open Credit Limit Filter: This filter enables you to monitor the customer's credit limit, prompting the system to take action when the limit reaches a predetermined percentage or specific amount.
- Filter types include:
- Equals
- Between
- Greater Than or Equal
- Less Than or Equal
- Filter types include:

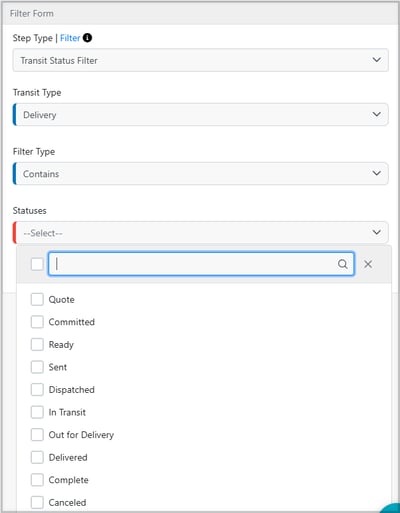
- Transit Status Filter: The Transit Status Filter enables Workflow Automations to trigger based on specific transit statuses, rather than just the overall shipment status.
- Equipment Type Filter: Triggers workflows when a specific equipment (trailer) type is selected on a shipment. You may optionally filter by trailer length for more precise matching. If the length is left blank, the workflow is triggered based on equipment type only.

Action Form
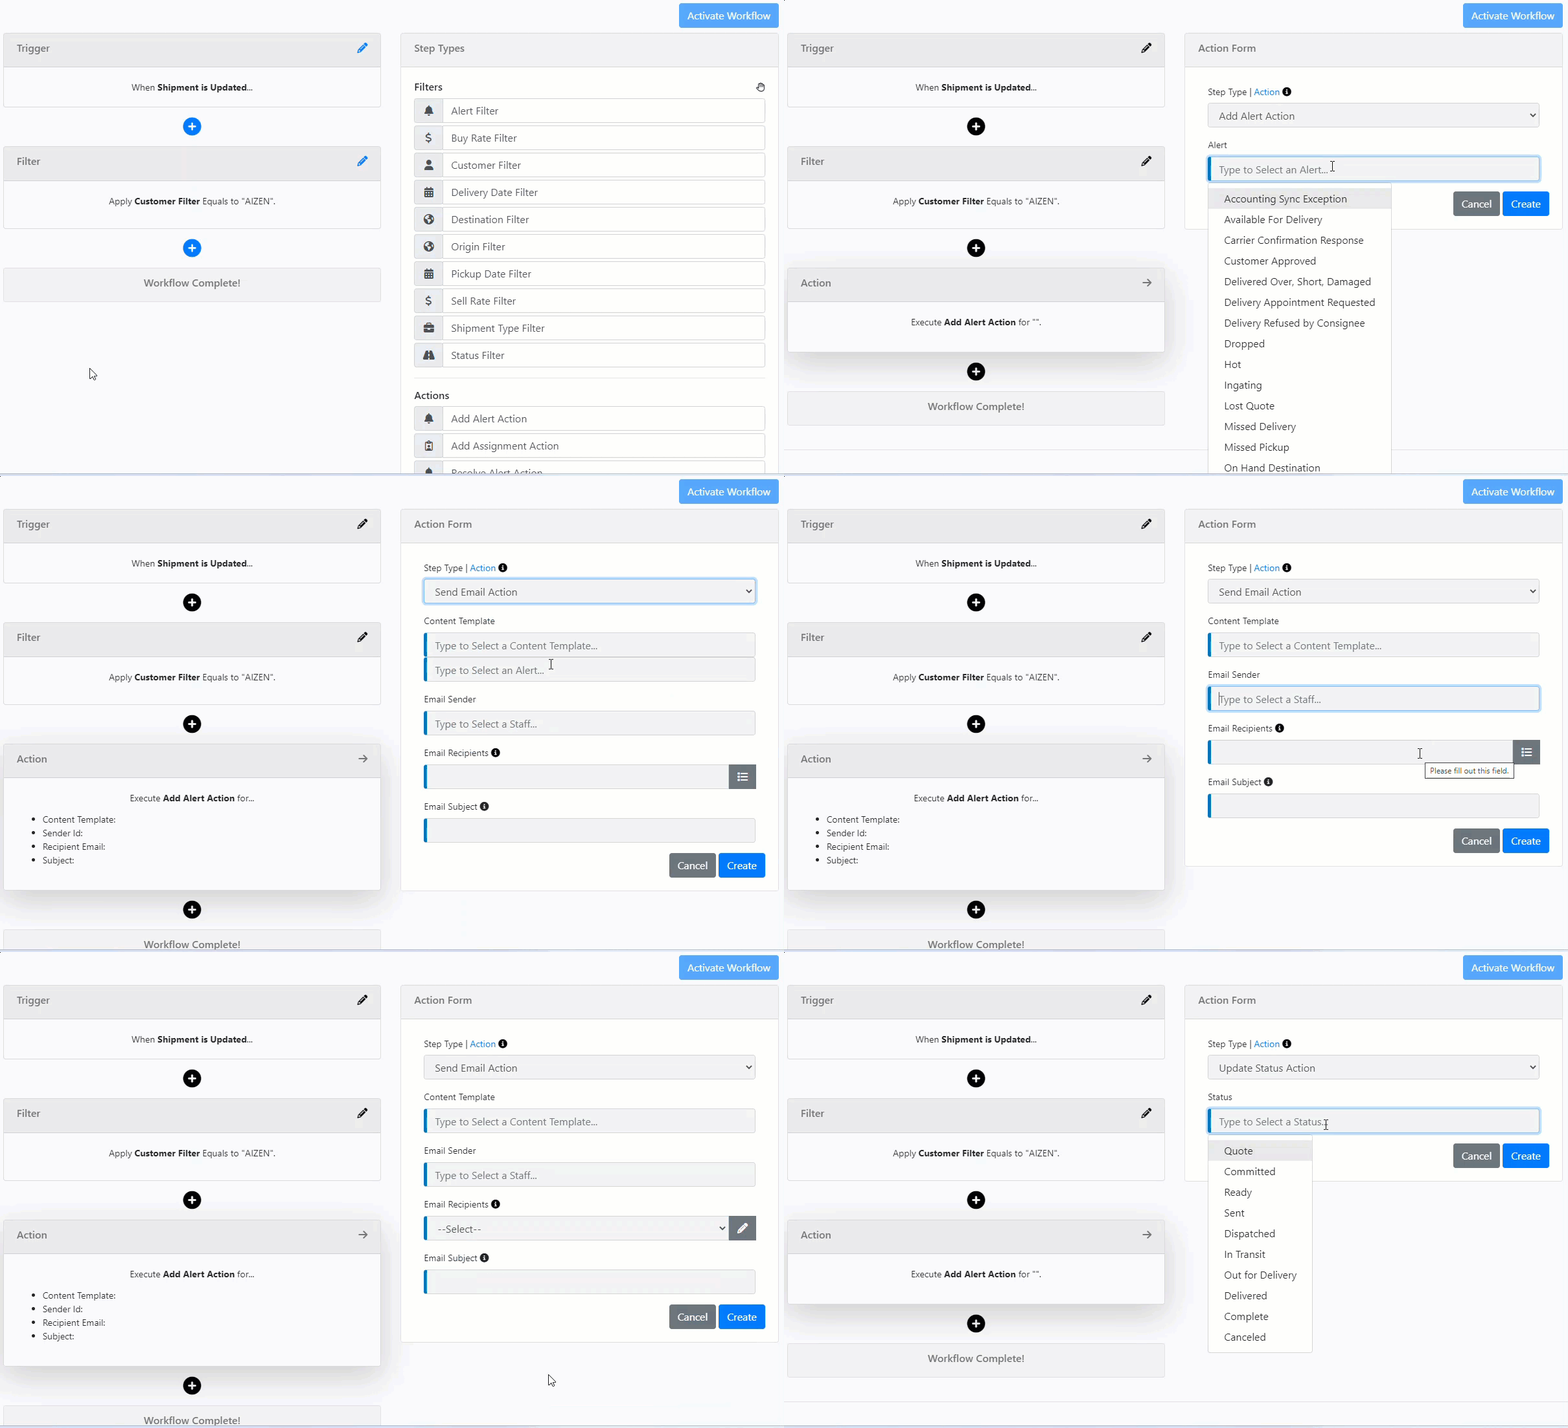
To access the action form, click on the filter option at the top right or drag and drop one of the Actions from the list. You can switch back to the filter form by clicking "Action."
Choose the desired step type from the list, and the system will display the corresponding step action. Once you have selected the appropriate step action, click on "Create" to add the action to your workflow.
Available Actions
- Add/Resolve Alerts
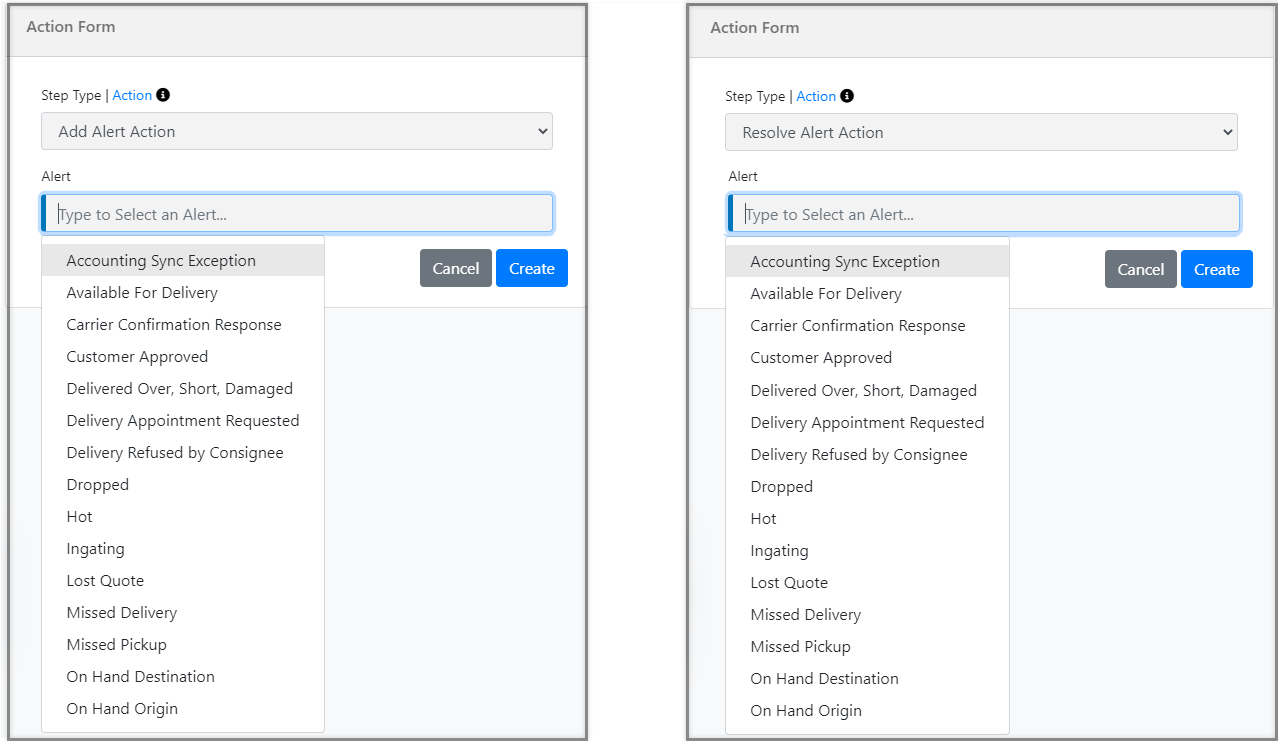
When certain conditions are met, the system has the capability to add or resolve alerts. By clicking on the alert field, a list of available alerts will be displayed. From there, you can easily select the specific alert that you want the system to either add or resolve.
- Add/Resolve Staff Assignments
The system can add or resolve shipment assignments based on specific criteria. You can use the staff ID field to select the LSP staff member for whom you want to add or resolve the shipment assignment.

When you choose the "Add Assignment Action," you have the option to click on the blue pencil icon, which allows you to select a specific LSP staff type rather than assigning an individual staff member.

-
- Assignment Delay
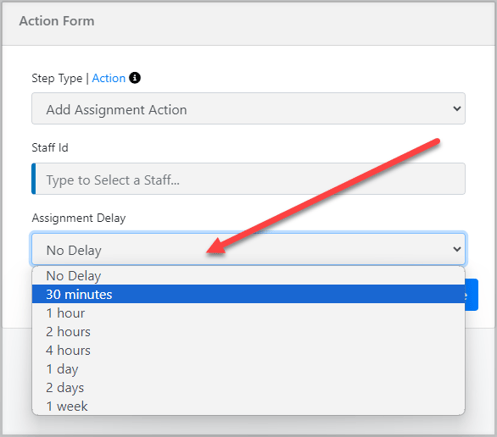
For the Add Assignment Action, the system also provides the option to create a delay for assignments, similar to how you would do it for a regular shipment assignment. This allows you to schedule when the assignment should appear after a specific amount of time has passed.
- Assignment Delay
- Add Assignment With Message
The system can add an Activity Log and assign it to a specific LSP staff member. In the Action Form, you can use the Activity Description field to input the message that you want the system to display when assigning the activity and the staff field will help select the LSP staff member you want to assign the activity to.
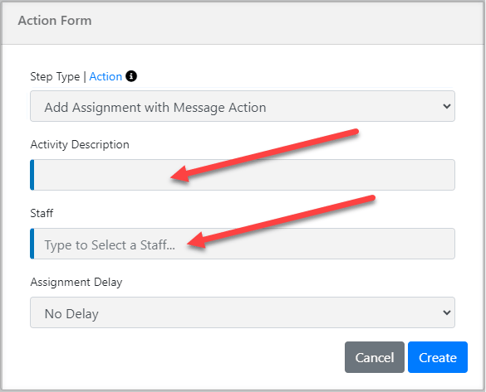
Click on the blue pencil icon to select a specific LSP staff type instead of an individual staff member.

-
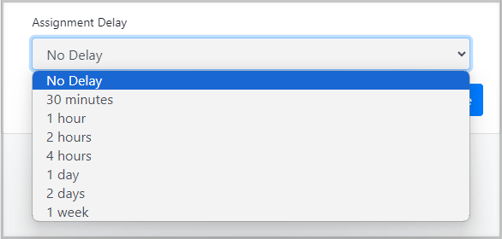
- Assignment Delay
The system also provides the option to create a delay for assignments, similar to how you would do it for a regular activity log in a shipment. This allows you to schedule when the assignment should appear after a specific amount of time has passed.
- Assignment Delay
- Carrier Check Call
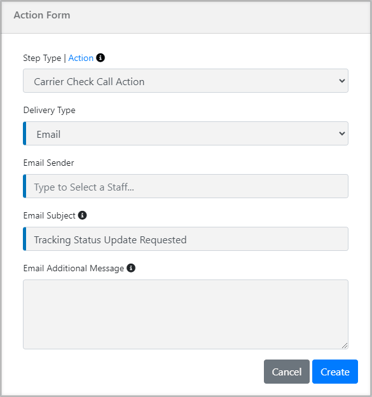
This action provides you with the ability to send carrier check calls either through email or text messages.
The content template associated with this action is called Truckload Shipment Tracking Status Update. You have the flexibility to customize this template according to your specific requirements.
- Email
If you choose email, the system will send an email to the first dispatcher listed in the carrier profile. You can select any available LSP staff member as the sender and have the option to add or update the email subject.
From the workflow, you can include an additional message if there is any extra information you would like to add on top of what is already provided in the content template.
-
- Text
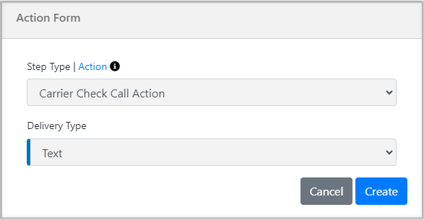
If you choose text, the system will send a text message to the driver's cell phone number associated with the shipment.
- Text
- Resolve All Assignments Action
With this action, the system can resolve the assignment for all shipments.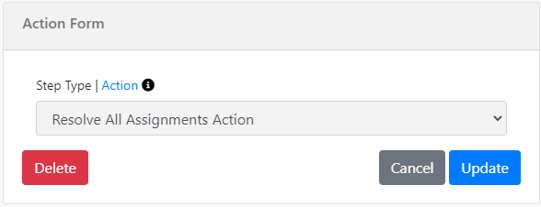
- Send Email Action
When certain conditions are met, the system will automatically send an email.

-
- Content Template
You can choose the email body from the selection of available content templates.
- Content Template
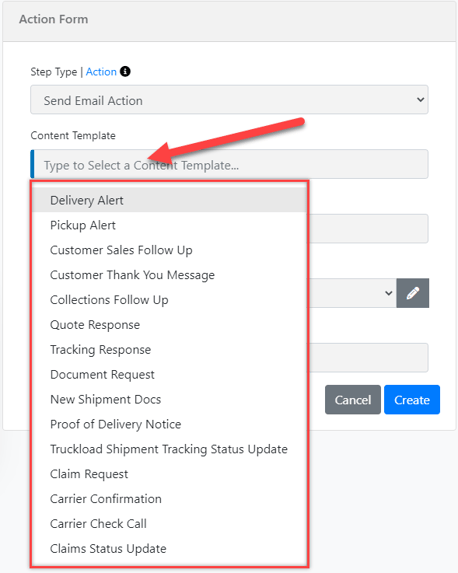
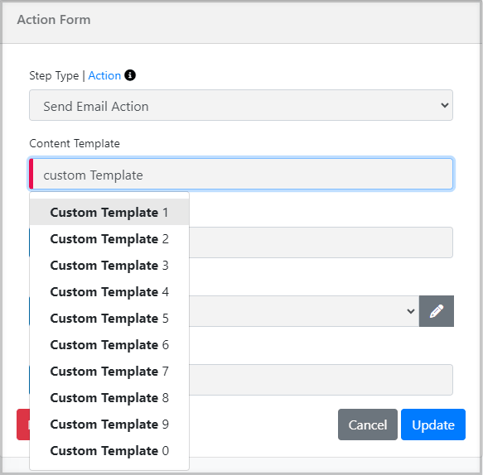
Note: If you need to send an email different from our templates, you can choose from up to 20 custom templates that can be personalized to your needs.
-
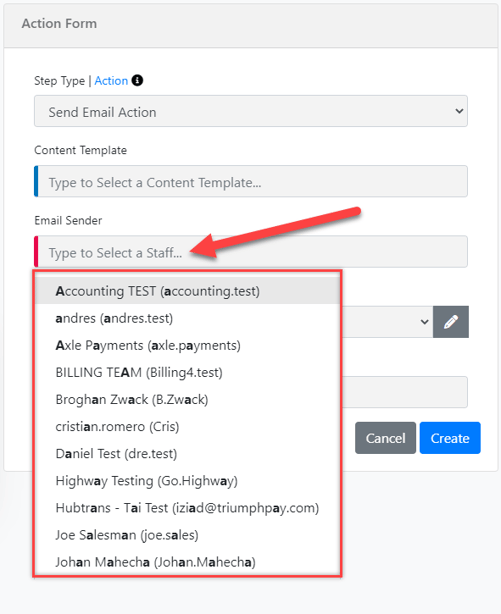
- Email Sender
Add the email sender you want to display from your list of LSP staff.
- Email Sender
-
- Email Recipients
You can choose the recipient from the available list, or if you need to add multiple emails, click on the pencil icon on the right and separate the email addresses with commas.
- Email Recipients
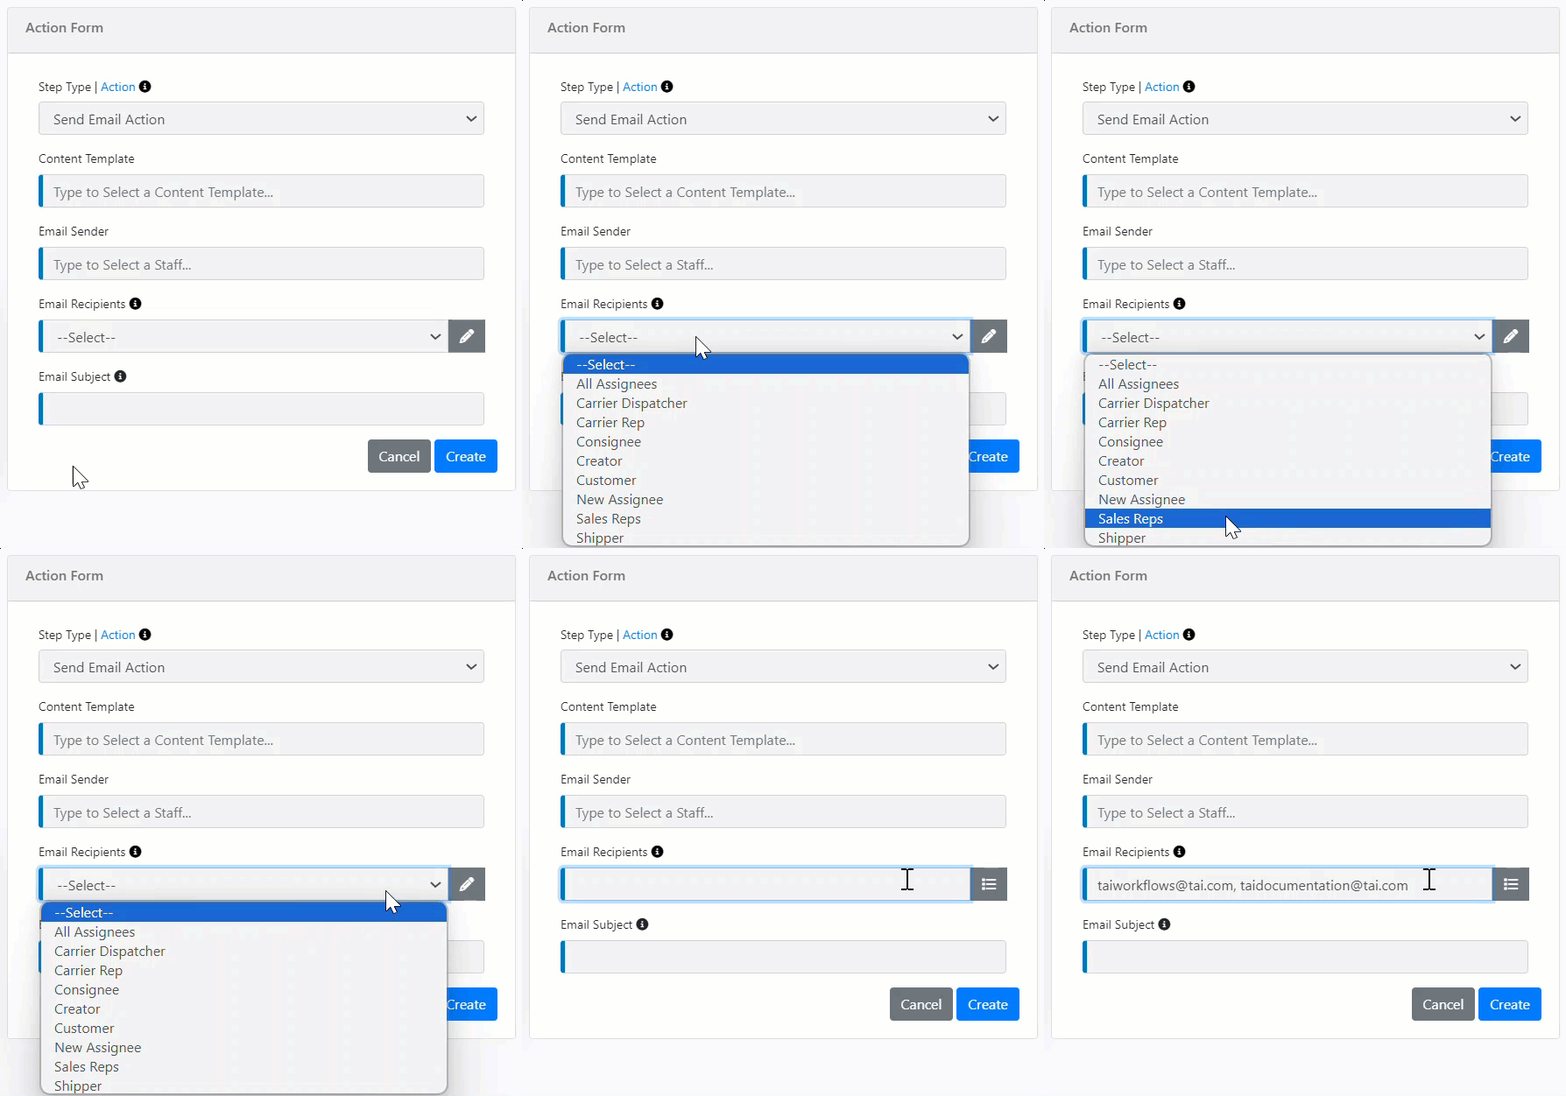
When the Carrier Dispatcher option is selected, the system will utilize the following hierarchy to determine the appropriate email address:
- Carrier Dispatcher in Shipment Profile: If an email address is available in the shipment profile, this will be prioritized and used.
- Favorite Dispatcher in Carrier Profile: If no email address is found in the shipment profile, the system will then check for a favorite dispatcher email in the carrier profile.
- First Dispatcher in Carrier Profile: If neither of the above options yields an email, the system will resort to the first dispatcher listed in the carrier profile.
- No Dispatcher Email Available: If no dispatcher email can be found in either the shipment or carrier profiles, the workflow will not be able to proceed and will fail.
Note: The "All Assignee" recipient option will send an email to all users assigned to the shipment. On the other hand, the "New Assignee" option is specifically designed to work with the "Assignment Added" trigger. This means that the system will send an email only to the newly assigned LSP staff member, excluding any other assignees.
-
- Email CC
You can select a recipient to CC from the list of available staff types. If you prefer to add a specific email address manually, simply click on the pencil icon located on the right. Additionally, you can include multiple email addresses by separating them with commas.

- Email Subject
In the final field of the Email Sender Action Form, input the subject for your email.
- Email CC

If a custom subject line is included in one of the content templates, the system will automatically fill in the email subject field in the action form. You also have the flexibility to edit this field and enter a different subject if needed.
Click HERE to learn how to set up a custom subject line.
- TMS Documents and Attachments
- Adding Attachments to Send Email Action
Add attachments when configuring the Send Email Action in Workflow Automation. The supported attachment types are:
- Adding Attachments to Send Email Action
-
-
- TMS Documents (system-generated documents such as BOLs, Carrier Confirmations, etc.).
- User Uploaded Attachments (documents manually added by users).
- In the Send Email Action configuration panel:
- Locate the fields TMS Documents and Attachments.
- Select one or more TMS Documents from the dropdown list. (These are system-generated documents.)
- Optionally, select user-uploaded attachments. (If no attachments of this type exist, the action will fail.)
- If a Content Template is selected that includes attachment tags, the relevant TMS Documents will be automatically selected.
- In the Send Email Action configuration panel:
-


- TMS Documents are system-generated and will always be available.
- Attachments rely on user-uploaded files. If none exist, the action will fail.
- If multiple attachments exist for a type, only the most recent one will be used.
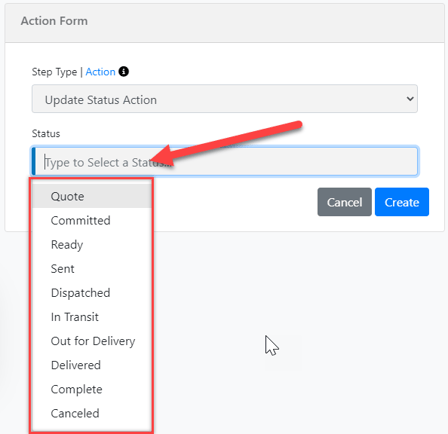
- Update Status Action
When certain conditions are met, the system automatically changes the shipment status to the chosen option from a list.
- Remove Carrier
This action enables users to automatically remove an assigned carrier from a specific transit leg within a shipment.

The "Remove Carrier Action" cannot be executed if the Transit Leg's Billing Status includes records in "No Accounting" or "Created" states.
- Remove Shipment Reference Number
This action removes a specific type of reference number from a shipment, streamlining data cleanup and management within workflows.

-
Assign Carrier Check Call Activity
This action assigns the activity log created from the carrier check call response to a designated LSP staff member.
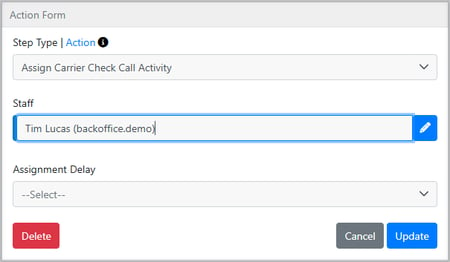

Click on the blue pencil icon to select a specific LSP staff type instead of an individual staff member.

-
Send Webhook Action
This action enables you to transmit webhook data to a designated URL. Upon execution, the system will dispatch the Shipment Create/Update Webhook payload to the specified address.
- URL: Enter the destination URL (required).
- Username (optional): For authentication, if needed.
- Password (optional): For authentication, if needed.
- License Key (optional): Additional credential option.

The system sends the shipment data in the same format as existing Shipment Create/Update webhooks.
-
Add Carrier Label Action
Automatically apply carrier labels based on behavior, shipment types, and key events. This allows you to later filter and segment carriers using those labels in Truckload Quoting.

Incompatible Triggers and Filters
Certain triggers require specific filters, and the system will notify you if the trigger you are using is not compatible with the filter you are trying to select.
Current Exceptions
-
Attachment Added Trigger→ Attachment Type Filter
-
Shipment Status Update Subscriber → Original Status Filter
-
Spot Quote Subscriber → Spot Quote Filters
- Alert Added/Resolved Triggers → Original Alert Filter
