Relay Payments
Speed up payments for lumpers securely and reliably and prevent expensive delays. Relay is accepted at over 90% of warehouses nationwide, allowing drivers to maximize their service hours by avoiding delays at the loading dock.
![]()
Table of Content
- Set Up
- Up To Amount
- How to Generate Payment Codes
- How to Regenerate a Payment Code
- How to Send the Code to the Carrier
- Registered Payments
- Receipts
- Reporting
Set Up
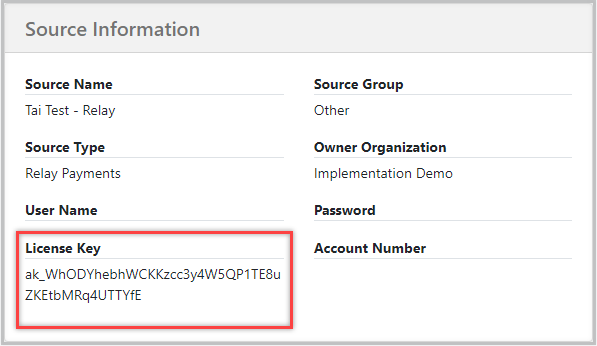
Create an Integration Source for Relay Payments. Enter the API Key provided by Relay in the license key section.
Up To Amount
The default Up To Amount is $500, but you have the flexibility to change this amount. Simply create a source setting called UpToAmount and set the value to your desired amount. The codes will then automatically default to this value when they are created.

How to Generate Payment Codes
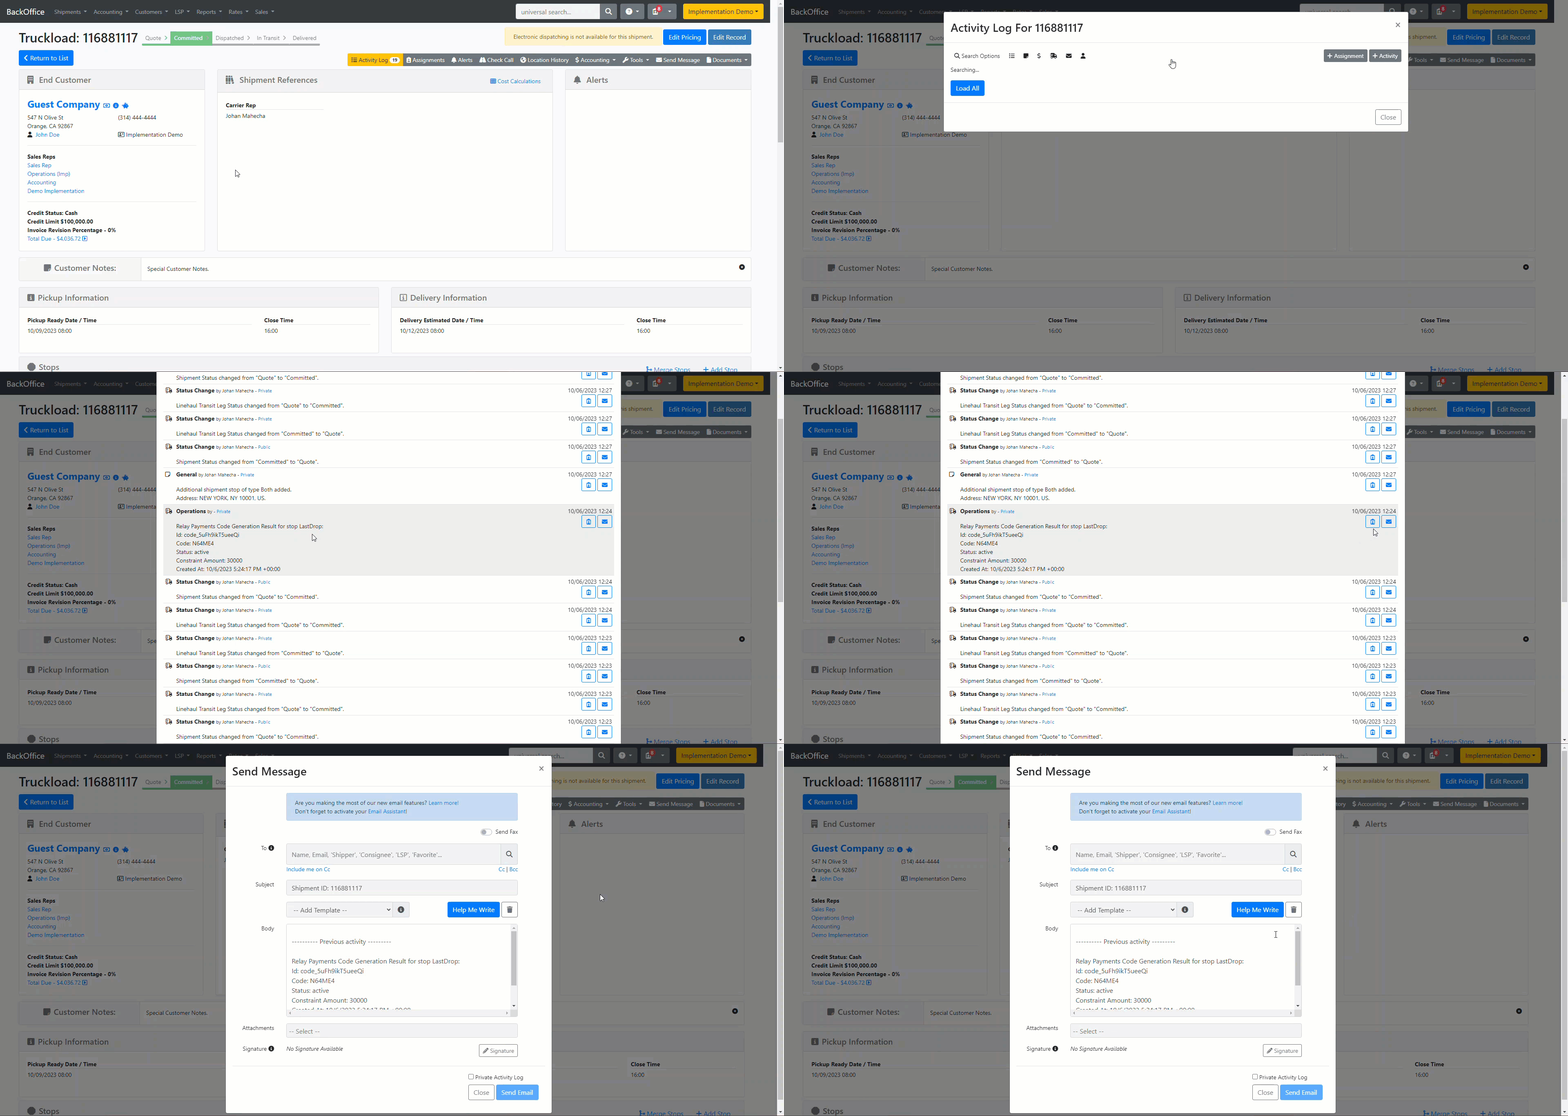
When you move the shipment status to Committed, the system will automatically generate Payment Codes for you. These codes can be easily located in the Last Drop Shipment References section.
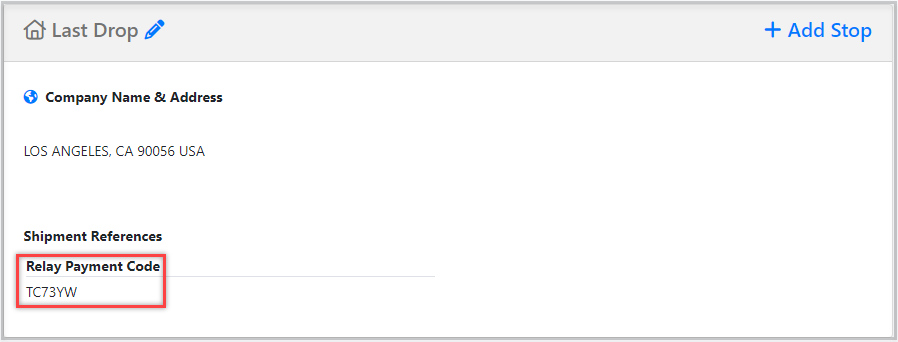
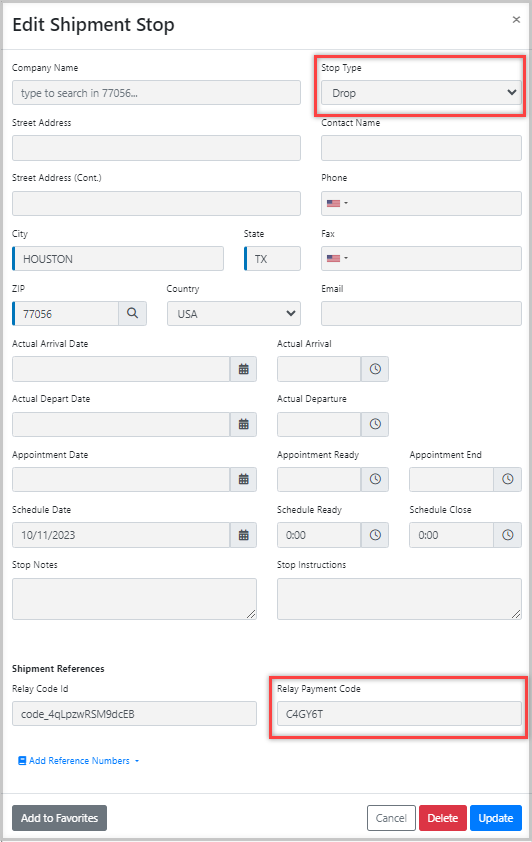
Note: The system will generate codes for each additional stop that is designated as Drop or Both.
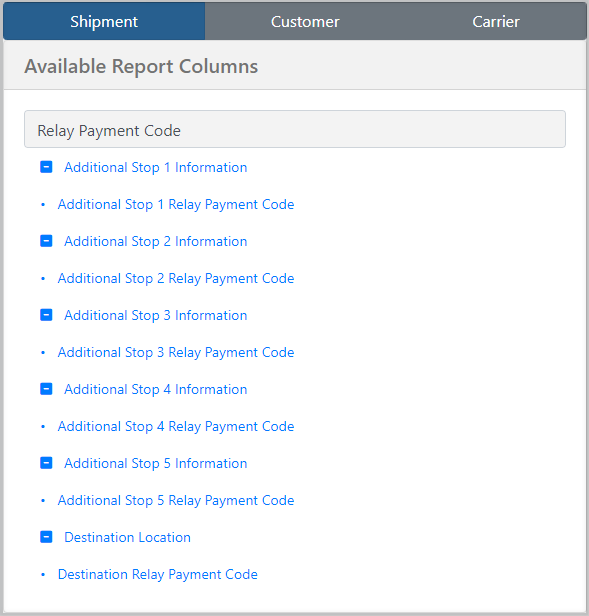
The system has a maximum limit of 10 payment codes that can be generated. However, for reporting purposes, the system will only provide information for the first 5 additional stops.
How to Regenerate a Payment Code
If you ever need to generate a new code for any of the stops, you can easily do so by the click of a single button.
- First, delete the existing code from the reference number for the stop that requires a new code by using the Delete Payment Code button

- Next, use the Generate Payment Code button. This simple action will prompt the system to automatically generate a fresh code for you. Note that the shipment must be in a status of Committed or beyond and the Delivery Estimated Date/Time must exist on the stop.

How to Send the Code to the Carrier
- The generated codes are automatically added as an activity log in the Shipment. From there, you can easily forward the message to the carrier.
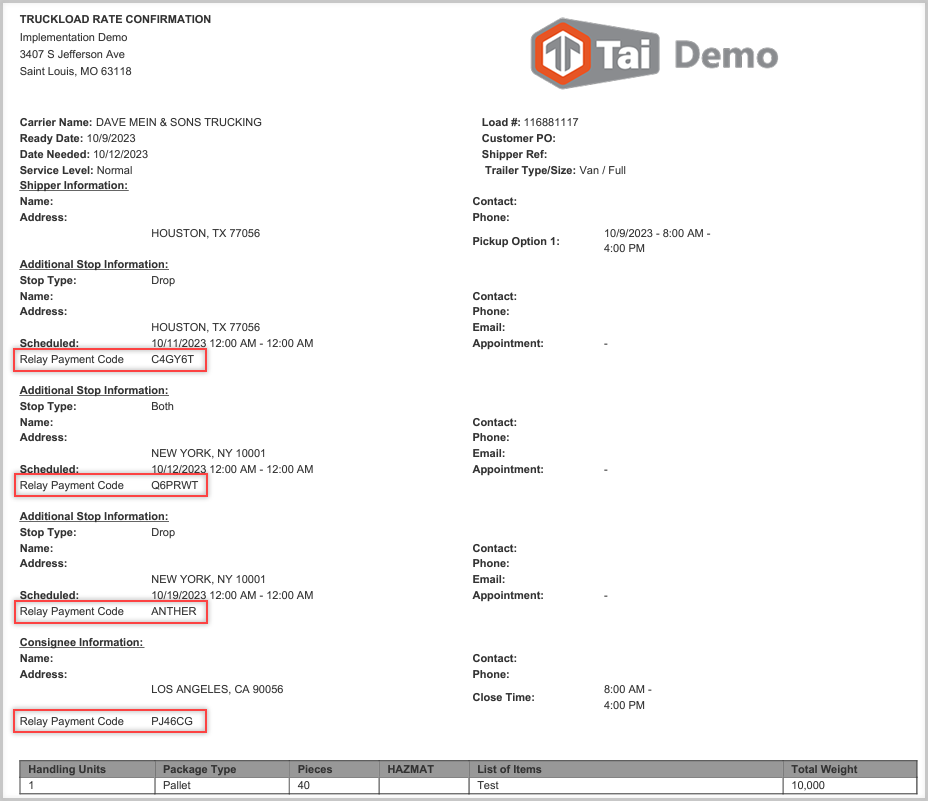
- To make sure that the Payment Code is easily accessible in the Carrier Confirmation, you can customize the content template. By adding the HTML code provided in this article, you can include Delivery References, Additional Stops References, or All Stop References in the Carrier Confirmation, which will include the Relay Payment Code.
Registered Payments
After a payment has been completed using the payment codes, the system will automatically create a Lumper Leg with Lumper Agent as the carrier and apply charges for each stop that used the code and its corresponding price. These charges will be registered as advance payments.

Note: If a bank account is desired when payments are automatically registered, users need to add the following source setting to their Relay integration and specify the bank account from their existing GL Bank Accounts. If no bank account source setting is specified, the system will not assign a bank account to these payments. Quickbooks users will encounter issues when attempting to sync payments without bank accounts. 

By default, the system will automatically apply the amount from registered payments to both the buy and sell. However, if you prefer the amount to only be added to the buy, you have the option to enable the "ApplyToBuyOnly" source setting. To do this, simply set the value to True in the integration source.
If you decide to charge your customers a fee for using Relay Payments, the system will automatically log the fee amount on the selling side in the TMS. Please contact Relay Payments for more information on how to set this up.
Receipts
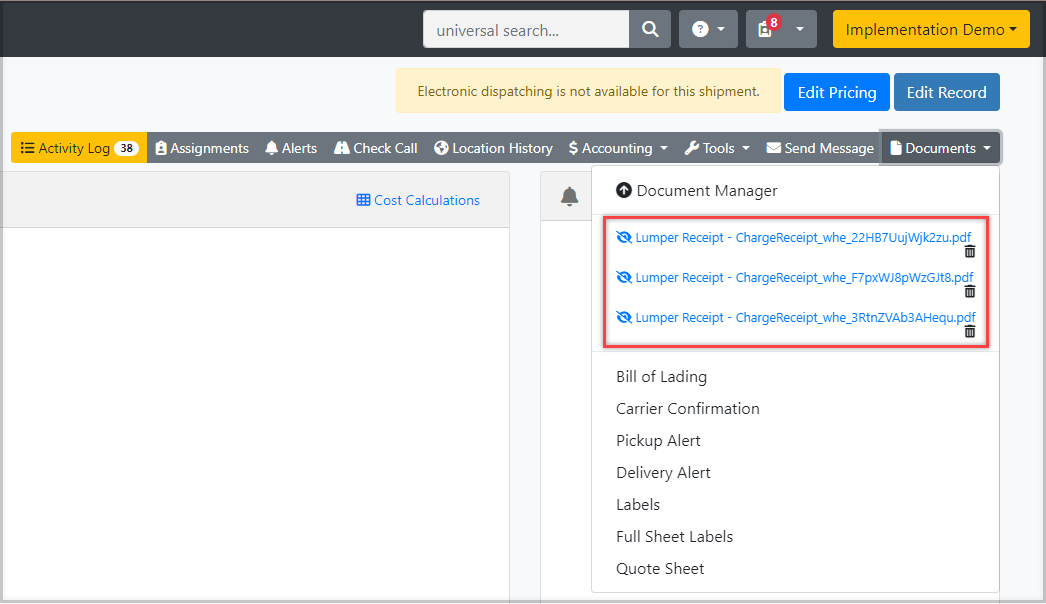
We will retrieve the receipts and include them in the shipment documents. These receipts will be stored as Document Type Lumper Receipts.
Reporting
We have made the payment code accessible in custom reports for each stop and the destination location. This allows you to easily generate a report that includes the payment codes for each specific stop and the final destination.
