For a detailed process on how to import live shipments or shipments that require accounting actions, visit Shipment Importer.
Template
-
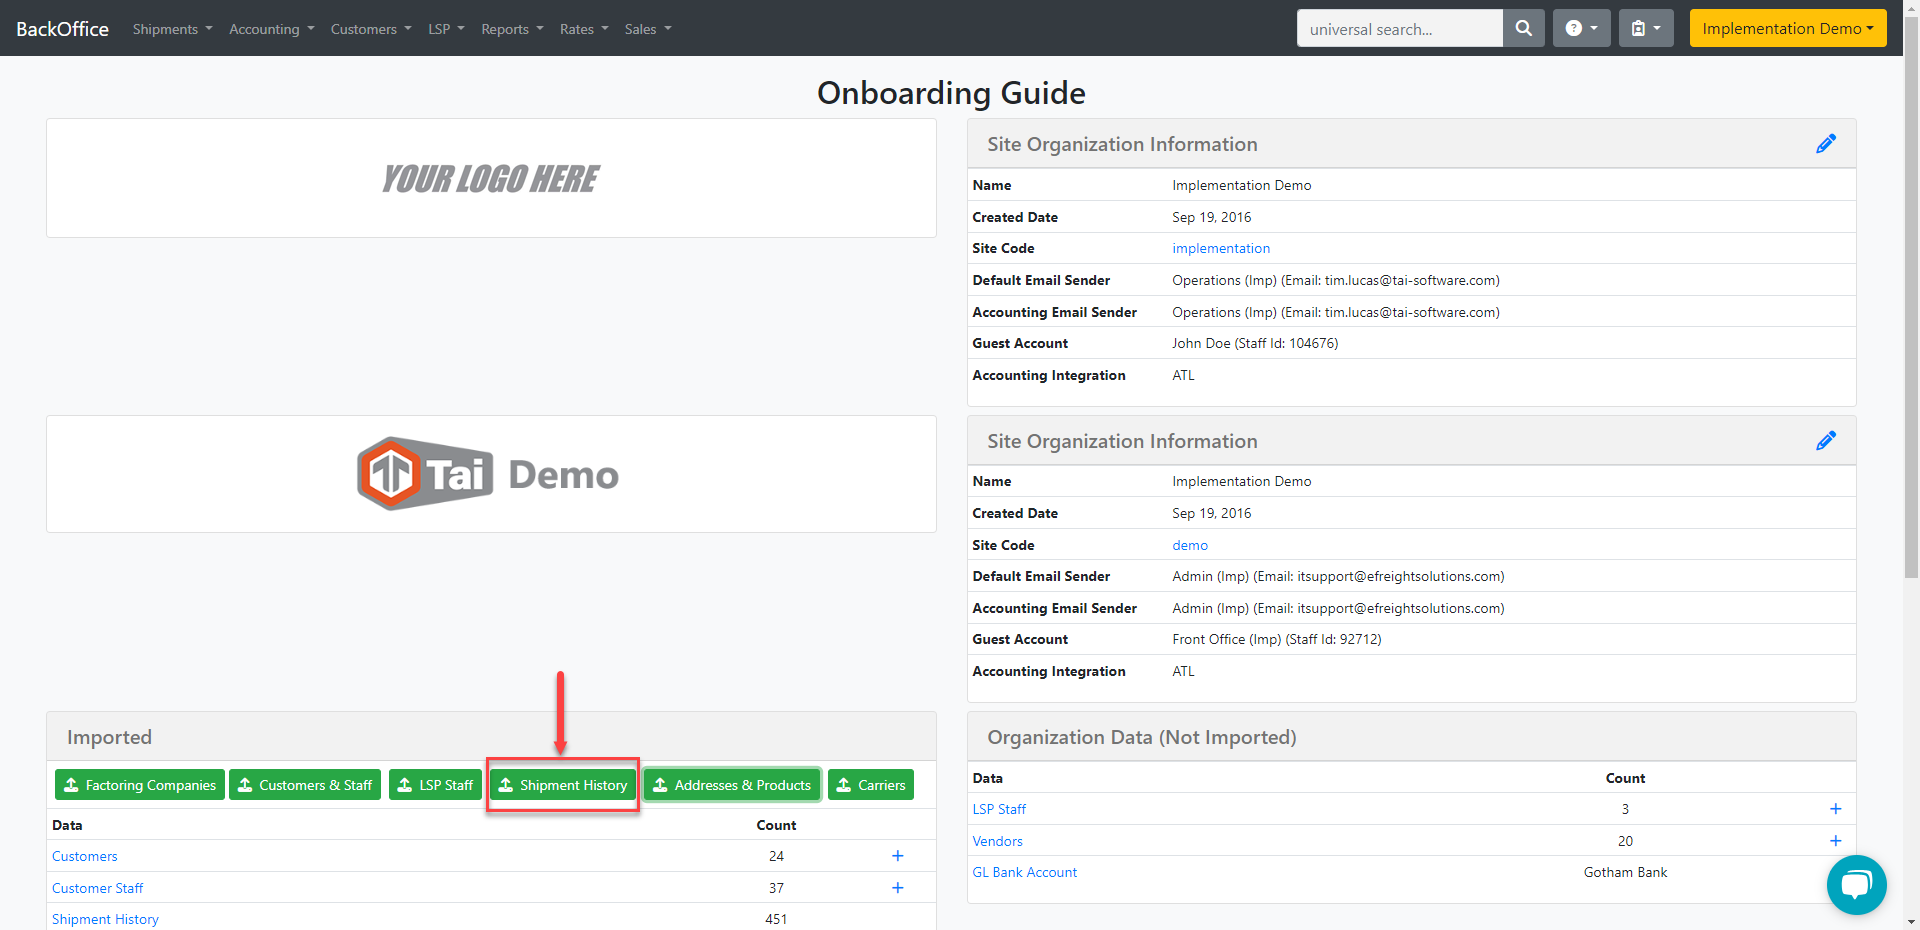
To download the template, go to the main dashboard, and at the top, click LSP.
- Click Onboarding Guide.
-
Under Imported, click the Shipment History option.
- Click the Template button at the bottom of the modal, this will download the Excel file that is needed to be imported correctly
Note: You will need TMS Admin permissions to access the Onboarding Guide.
Verification Checklist
There are some mandatory fields in this template that you must fill to upload the template without getting any errors:
-
Shipment ID, This should always be empty because the system will assign the shipment ID automatically.
-
Sales Rep ID, Add the staff ID of the staff you want to add as the sales rep for that shipment.
- Customer Name, Make sure to spell the name of the customer the same way as it is on the TMS, otherwise, the upload will fail because the system will not find the customer.
Note: If the customer name does not match or is not already created, the system will automatically create a customer profile with only the name and no additional information. - Pickup Date, use the short date format on this cell.
- Origin/Destination City, ensure it has the correct spelling.
- The Origin/Destination State must be limited to 2 alpha characters.
- Make sure Origin/Destination Zip codes are entered as text with leading 0s when necessary. "07761" instead of "7761" (consider that Excel will remove leading 0s if you do not format the cell as text).
-
Remember that the system will allow you to have zip codes with no less than five characters but a maximum of 7.
-
-
For Origin/Destination Country, ensure you add USA or Canada in that exact format. For other Countries, make sure to spell the name correctly. Avoid abbreviations in both cases because that will cause the upload to fail. Remember you can always check the TMS and see how this name shows up there.
-
Shipment Type, Select from 'LTL', 'Truckload', 'Domestic Freight', 'Small Package', 'Cartage', or 'Drayage. Make sure you spell them in that specific format, avoid abbreviations because they will cause the upload to fail.
- Equipment Type, Equipment Accent, and Equipment Length (exclusive for truckload shipments). Please verify the available equipment types from our list by clicking here. Make sure you spell them in that exact format — if an exact match is not found, the shipment will default to Van.
- Trailer Size, (exclusive for truckload shipments). This can be either Full or Partial.
- Carrier Identifier, The system can Identify the carrier by MC or DOT #. By default, we search by MC #, but in the second step, there is a toggle you can use to use DOT instead. Ensure that you do not mix these numbers during the upload process, as it may result in incorrect data or failed uploads.
Also, If it is an MC#, ensure they have at least six digits, adding at the beginning the missing zeros. - Weight Total, Make sure to add the weight of the shipment as it is mandatory, if the customer does not have it you can place a 1, otherwise, this will cause the upload to fail.
Note: Please verify that the values in this column do not exceed the maximum limit of 999,999, otherwise the import will fail. - Hazardous Material, The value should be "True" or "False".
- Pieces Total, always add the pieces of the shipment as it is mandatory, if the customer does not have it you can place a 1, otherwise, this will cause the upload to fail.
Note: Please verify that the values in this column do not exceed the maximum limit of 999,999, otherwise the import will fail. - Description, Commodity info is mandatory at the moment of the load creation.
-
Do Not Dispatch Carrier, The system is going to upload the shipments as completed, we do not want to send any request to the carriers so this should always be TRUE.
- Buy (greater than 0) Amount the broker paid the carrier.
- Sell (greater than 0) Amount the customer paid the broker.
- Fuel Buy, Fuel Sell, Accessorial Buy or Accesorial sell. Will add to the total amount of the shipment, confirm this with your customer so you dont have errors of pricing ar the end of the importing of the history.
-
Accessorial codes: To add accessorials to the shipments, you must use our accessorial codes found in TMS admin under Rates.
Note: If customer inputs data on the following columns please verify that the values in this column do not exceed the maximum limit of otherwise the import will fail.
- Handling Quantity - 9,999
- Length / Width / Height - 999,999 or blank