Template
-
To download the template, go to the main dashboard, and at the top, click LSP.
-
Click Onboarding Guide.
-
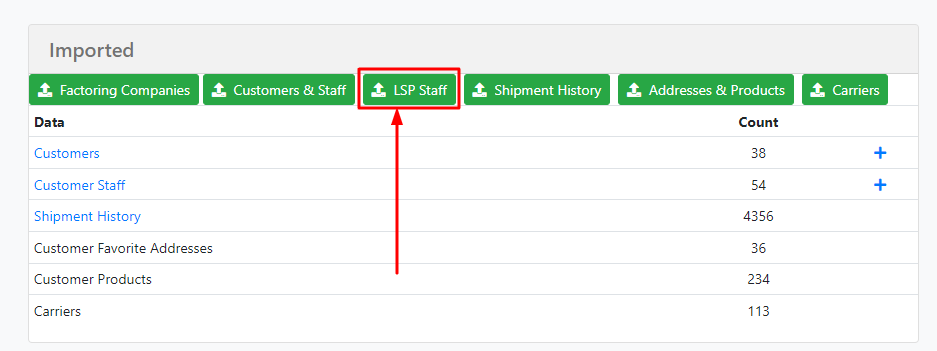
Under Imported, click the LSP Staff option.
Note: You will need TMS Admin permissions to access the Onboarding Guide.
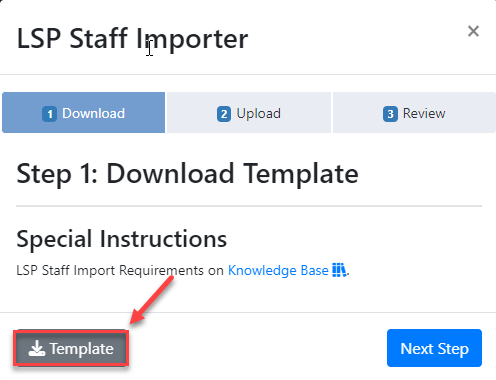
4. Click the Template button at the bottom of the modal which will download it.
Verification Checklist
- Organization ID, if the broker has sub-organizations this is the place where you will add the organization ID the staff member belongs to.
- Contact Name, Login, and Password; are mandatory fields. The onboarding specialist will assign a default password, the login name will be equal to the email address sent by the broker (Remember every login credential must be unique).
- The State must be limited to 2 alpha characters.
- Make sure Zip codes are entered as text with leading 0s when necessary. "07761" instead of "7761" (consider that Excel will remove leading 0s if you do not format the cell as text).
-
Remember that the system will allow you to have zip codes with no less than five characters but a maximum of 7.
-
-
For Country, ensure you add USA or Canada in that exact format. For other Countries, make sure to spell the name correctly. Avoid abbreviations in both cases because that will cause the upload to fail. Remember you can always check the TMS and see how this name shows up there.
- All Emails must be entered in a valid format or left blank. Invalid emails in any of the following fields will cause a failure to import. This is also a mandatory field.
- Staff Type: Create a staff either as an Individual or Team staff.
- Team Staff ID: Add the staff under a team by adding the Team Staff ID.
- Set up the permissions for the staff member, and check general instructions with the explanation below.
* These Permissions and Commissions configurations should be provided by the Broker. If they are not provided, Broker will have to set them up one by one which will generate extra work for them.
General instructions
Tariff Settings
Columns from S to U are the Tariff settings you can enable for an LSP staff to view when generating a smart quote. Values should be True or False.
Permissions
Columns from V to AT are the permissions you can enable for an LSP staff; This determines what they have access to in the Backoffice. Values should be True or False.
For more information, please check the Staff Permissions article.
Commissions
Commission Calculation Type: "Flat" or "Percentage of Margin".
Commission Rate: Add the % for the percentage of Margin; if Flat, the number will be a dollar amount.
Commission Min - Commission Max: Add the minimum and maximum amount the staff can get for commissions.