Template
-
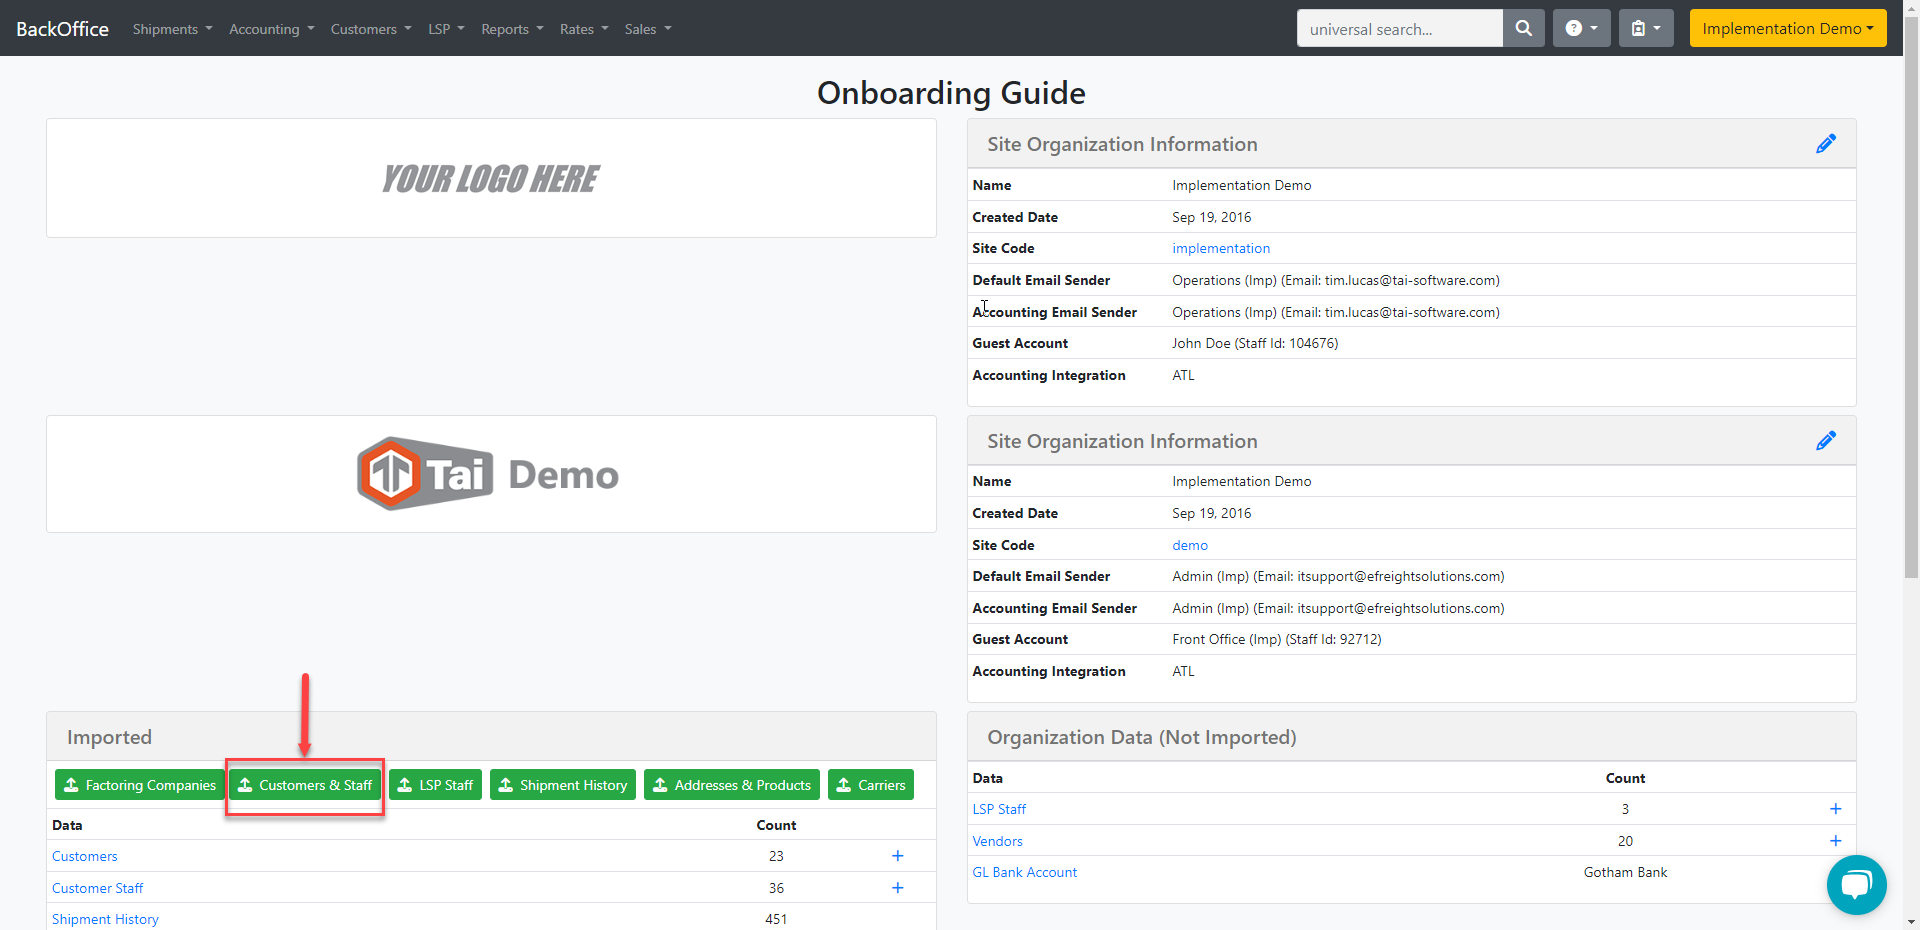
To download the template, go to the main dashboard, and at the top, click LSP.
- Click Onboarding Guide.
-
Under Imported, click the Customers & Staff option.
Note: To view and download the templates, TMS Admin permission is required. However, only Tai Support members can upload them into the system for you.
Verification Checklist
The Customers & Staff template has two sheets, each of which has some mandatory fields, here are some tips that will help you with the process of importing.
Please note that there are several mandatory columns that must be filled out to provide essential information for the customer on the TMS, customer portal permissions, and accounting. These columns will be highlighted in light red for easy identification.
Customer Template
- Parent ID, This option allows you to create customers under sub-orgs/offices. The system will place the customer under the parent organization if left blank.
- Name is a required field. Please double-check it to avoid duplicates. You can also cross-check it with the address information.
In case there are duplicate customer names with different addresses, you can add the city or state name to the customer's name. This will make it easier to identify the customer when creating a load. - The State must be limited to 2 alpha characters.
- Make sure Zip codes are entered as text with leading 0s when necessary. "07761" instead of "7761" (consider that Excel will remove leading 0s if you do not format the cell as text).
-
Remember that the system will allow you to have zip codes with no less than five characters but a maximum of 7.
-
-
For Country, ensure you add USA or Canada in that exact format. For other Countries, make sure to spell the name correctly. Avoid abbreviations in both cases because that will cause the upload to fail. Remember you can always check the TMS and see how this name shows up there.
- When adding Phone, Mobile, or Fax numbers, do not include special characters or spaces and limit the numbers to 10 digits.
- LSP Alert email, All emails must be entered in a valid format or left blank. Multiple emails can be added by separating them with commas.
- Dimensions Required is a mandatory field, The value should be "True" or "False".
- NMFC Required is a mandatory field, The value should be "True" or "False".
- If the Margin is not placed in the template, it will default to no margin.
- Commission Staff ID, make sure to add the LSP Staff ID from the list under LSP > Staff to set them up as a sales rep under the customer.
Customer Accounting Profile
- Tax Number, Customers can add a Tax number per customer if required.
- Credit Limit, If left blank, the credit limit will be 0.
- Payment Terms, You can add any number to this field; if left blank, it will default to 30 days.
- Allow Zero-Margin Invoice Automation, Value should be True or False. It allows automation to function even though the shipment has a 0 margin.
- POD Required With Invoice, Value should be True or False.
- BOL Required With Invoice, Value should be True or False.
- Enable Past Due Notification, Value should be True or False.
- Include Shipment Owner On Invoice, Value should be True or False.
- Collection Notice Delivery Frequency and Statement Delivery Frequency, If left blank, it will default to Never. Options are:
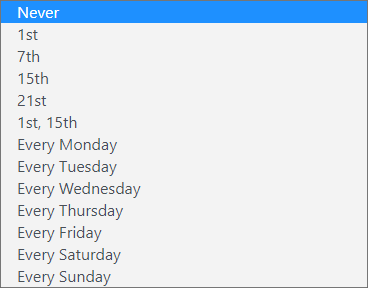
Delivery Frequency Acceptable Values
-
Never / 0
-
1st / First / 1
-
7th / Seventh / 7
-
15th / Fifteenth / 15
-
21st / Twentyfirst / 21
-
1st, 15th / FirstAndFifteenth / 22
-
Every Monday / EveryMonday / 40
-
Every Tuesday / EveryTuesday / 41
-
Every Wednesday / EveryWednesday / 42
-
Every Thursday / EveryThursday / 43
-
Every Friday / EveryFriday / 44
-
Every Saturday / EverySaturday / 45
-
Every Sunday / EverySunday / 46
-
- Invoicing Automation Method: Options are Manually Invoice, Auto Invoice at Billing, Auto Invoice at Delivery and Auto Invoice at Booking. If left blank it will default to Manually Invoice.
Invoicing Automation Acceptable Values
-
Manually Invoice / ManuallyInvoice / 0
-
Auto Invoice at Billing / AutoInvoiceBilling / 1
-
Auto Invoice at Delivery / AutoInvoiceDelivery / 2
-
Auto Invoice at Booking / PayAsYouGo / 3
-
- Credit Status: Options are Cash, Credit approved, One Order at a Time, Continual Credit Card, Credit Hold, or Collections. If left blank, it will default to Cash.
- Preferred Invoicing Method: Options are Email, Prepaid, Do not send, Print, Digital, and Factoring. If left blank, it will default to Email.
Acceptable Values
-
Email / 0
-
Prepaid / 1
-
Do Not Send / DoNotSend / 2
-
Print / 4
-
EDI / Digital / 5
-
Factoring / 6
-
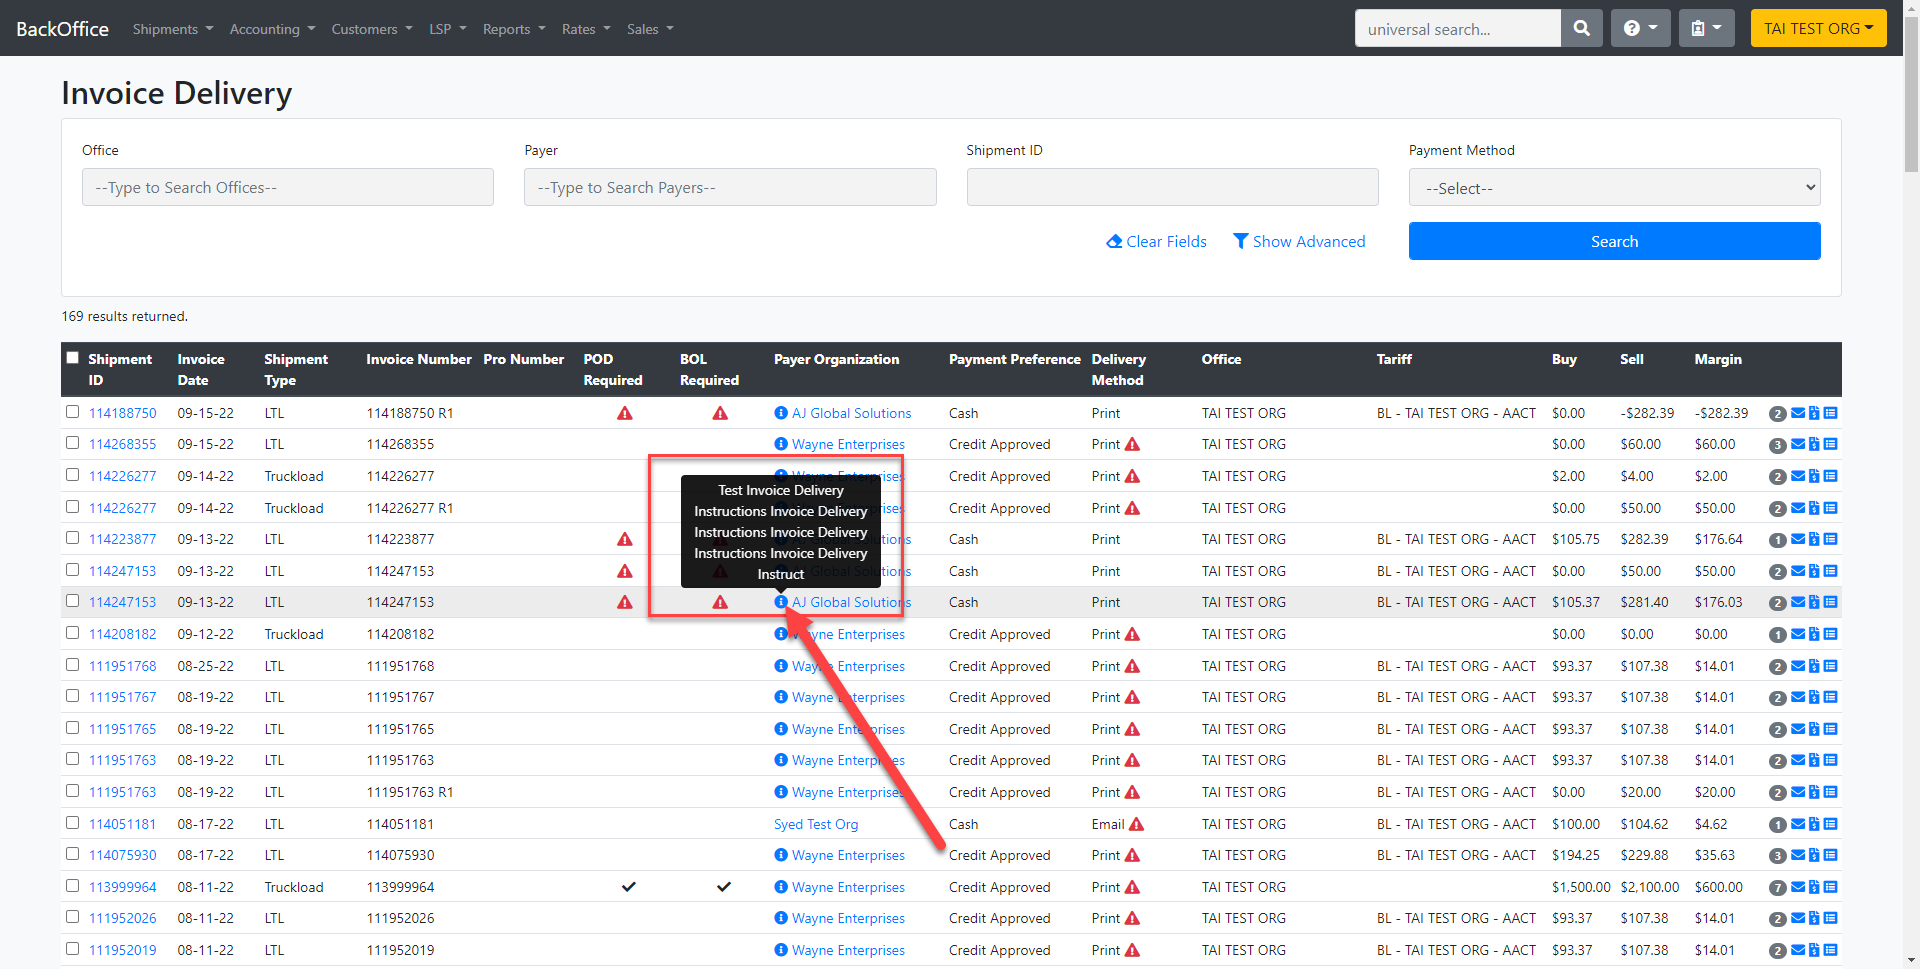
- Invoice Delivery Instructions: Customers can add any notes they require for their customers. These notes will be available on the invoice delivery screen by hovering over the blue information icon.
- Customer ID: You can use this option to update existing customer staff in bulk by adding the customer's ID. Please leave this field blank if you attempt to add new customer staff.
- Company name, Make sure to add the exact name of the customer so the system adds the staff to the correct one.
- Logins, To ensure that each staff member has a unique login, please note that the system checks against Tai's complete list of customer logins. If a duplicate login is found, the staff import will not be successful. You will be notified of the duplicates so that you can try again.
- Invoice payments: The system will include the staff’s email in the invoice notification. Value should be "True" or "False."
- Send Email Status: The system will send updates to the staff’s email every time the shipment status changes. Value should be "True" or "False."
Staff Settings
- Columns from S to X are the shipment types you want your customer staff to see in the customer portal. Values should be "True" or "False."
- Reports: This allows the customer staff to access reports in the customer portal. Value should
be "True" or "False."
Tariff Settings
- Columns from Z to AD are the Tariff settings you can enable for customer staff to see in the customer portal. Values should be "True" or "False."