Teams Overview
Teams is a collaboration tool within the TMS designed to enhance communication and workflow across different operational departments through Group Email and shared task management.
You might have Teams for Sales, Accounting, Customer Service, Operations, and more. The goal is to help you and your organization work more effectively within these teams.
How Do Teams Work?
Every LSP Staff member created in the TMS has a Staff Type, which can be either:
-
Individual, or
-
Team
A Staff record labeled as a Team is not intended for a single user’s daily login. Instead, it functions as a shared group that Individual staff members can subscribe to.
By selecting a Team in your LSP Staff Profile, you can:
-
View all assignments created for that Team
-
Use the Team’s email address when sending emails from the TMS
This setup makes it easy to share work, distribute responsibilities, and send messages from shared mailboxes such as: accounting@yourorganization.com, sales@yourorganization.com, or customerservice@yourorganization.com.
How to Create a Team
Creating a Team follows the same process as adding a new LSP Staff member.
-
Navigate to the LSP menu and click Staff.
-
Click the green Add New LSP Staff Member button in the top-right corner.
-
Fill in the required fields and adjust settings as needed:
-
Name
-
Unique Login
-
Email Address
-
Organization
-
Staff Type: Select Team
-
-
Click the blue Save & View Details button in the top-right corner.
Once saved, your Team is created, and Individual staff members can subscribe to it.

How to Join a Team
Any existing LSP Staff member in your organization can join a Team.
Note: Each individual can belong to only one Team at a time.
-
Navigate to the LSP menu and click Staff.
-
Locate your Staff account and click the blue Edit (pencil) icon.
-
Scroll down to the Team Settings card and ensure your Staff Type is set to Individual.
-
In the Team dropdown, select the desired Team.
-
Click Save & View Details in the top-right corner.

After joining, you’ll have access to:
-
The Team’s email address for outgoing messages.
-
All assignments assigned to that Team.
What’s Next?
As a Team member, you gain two key features:
-
Team Assignment Visibility
-
Access to the Team Email Address
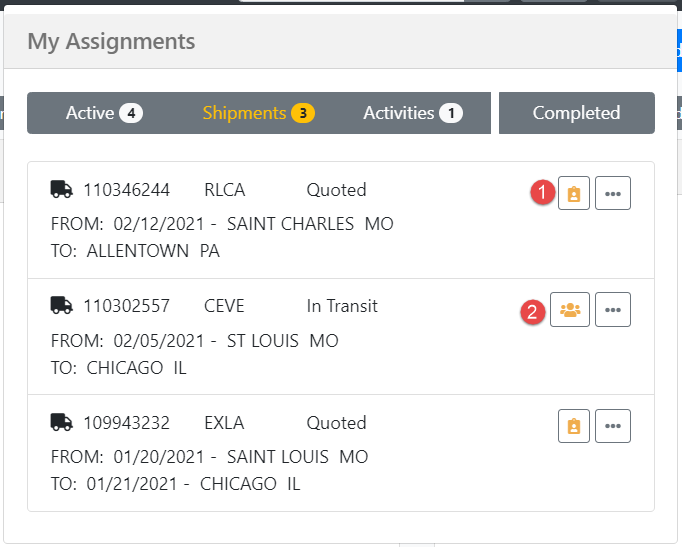
When a task or shipment is assigned to your Team, it appears on your Assignments Dashboard with an alert badge.
Team assignments are visually distinct, marked with a Team icon, while your personal assignments use the standard clipboard user icon.
Before completing a Team assignment, you must first claim it — this ensures everyone knows who’s working on it. Once claimed, the assignment converts to a personal (user) assignment, and it’s removed from the Team’s shared queue.
Assignment Types:
-
User Assignment: A task visible only to you.
-
Team Assignment: A task visible to all team members. Before completing it, click Claim to take ownership. This converts it into a personal assignment and prevents duplication of effort.
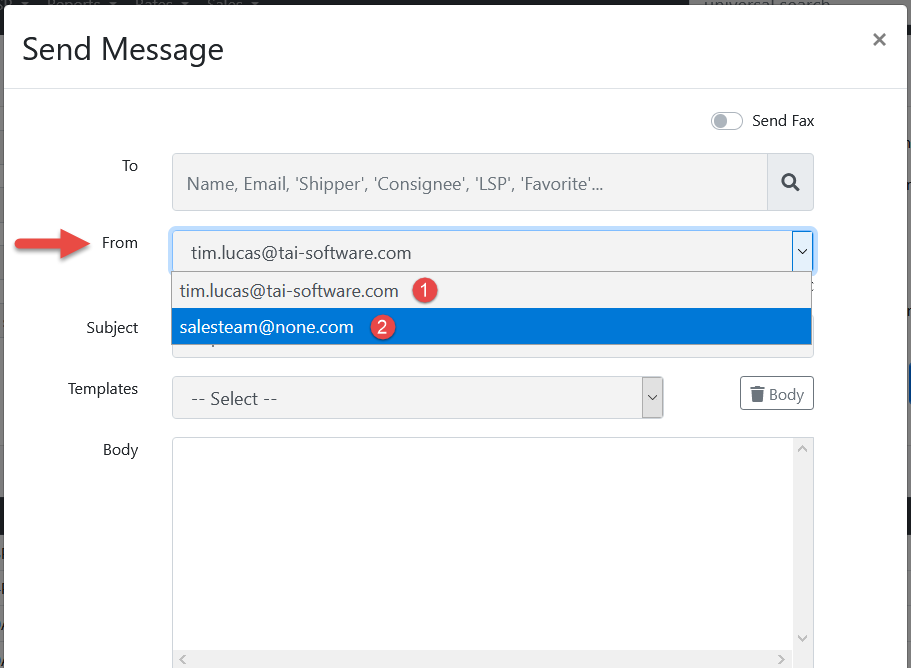
You’ll also have access to your Team Email Address when sending messages from the TMS.
Normally, your messages use your individual LSP Staff email by default. However, in the Send Message modal, you can now select your Team Email Address from the “From” dropdown menu whenever you need to send messages on behalf of your team.