Modify Bill Modal Overview
The Modify Bill modal supports two distinct operations. They look similar inside the modal but produce different results, so choose based on what you are trying to accomplish.
- Add Bill Adjustment (revision). Creates a new, separate bill linked to the original. The original bill is NOT changed. Use this for adding a missed charge.
- Modify Bill Details. Edits the fields on the original bill in place. Use this only to correct information on the original record.
When you open the modal, the system automatically proposes a revision bill number in the format {OriginalBillNumber} R{N} (for example, ABC1234 R1). You can accept the proposed number or enter your own.
Which option should I use?
| Situation | Use |
|---|---|
| Add a charge that was missed on the original bill | Add Bill Adjustment |
| Correct a typo or adjust a due date on a bill that has NOT been synced externally | Modify Bill Details |
| Bill has already been synced to QuickBooks Online or another accounting system | Add Bill Adjustment (preserves integrity on the external side) |
| Carrier submitted a revised invoice for the same charge | Add Bill Adjustment |
Modify Bill Details overwrites data on the original record and does NOT re-sync to external accounting systems. Prefer Add Bill Adjustment whenever a clean audit trail matters.
Add Bill Adjustment
⚠ IMPORTANT - Read before using Add Bill Adjustment
Revision bills created through this workflow do NOT trigger downstream automation. The following will not run for a revision bill:
- QuickBooks (and other external accounting) sync - the new revision bill will not sync automatically.
- Create Invoice webhooks - subscribers will not receive a webhook for a revision’s matching invoice.
- Invoice Delivery - the revised invoice will not be queued for automated delivery to the customer.
If the original bill or invoice has already been synced to your accounting platform, any changes you make here must be manually adjusted on the accounting platform side. Tai cannot push these revisions through the integration, so leaving the external system un-reconciled will cause drift between Tai and your books.
Plan for manual cleanup before you click Save. If you are not sure whether the original bill synced, check Accounting > Accounting Sync History before proceeding.
Use this option to add a new charge to a bill that is already approved or paid.
Steps
- Pull up the shipment: locate and open the shipment that contains the bill you want to revise.
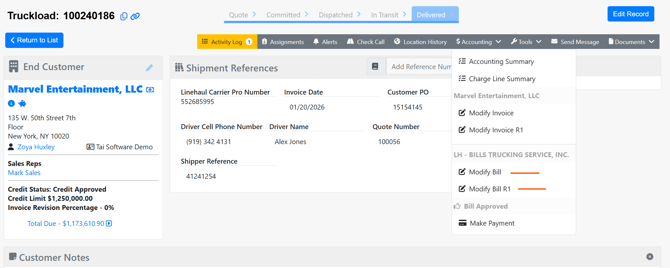
- Click on Accounting.
- Select Modify Bill.
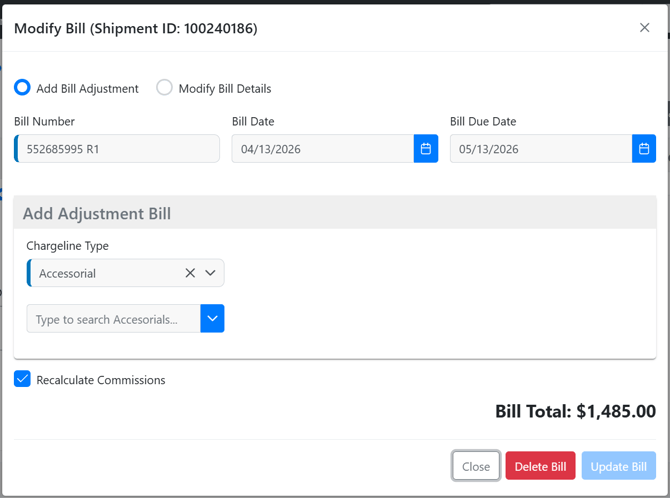
- Choose Add Bill Adjustment.
- Add the additional charge(s).
- Review the Recalculate Commissions option (see below).
- Optionally enable Include Invoice Revision if the customer invoice also needs a matching change.
- Save.
Result
- A new, separate bill is created with an
R1,R2, etc. suffix on the bill number. - The new bill is linked to the original via an Original Bill ID reference.
- The original bill is untouched; its amount, bill number, and prior sync history remain as they were.
- Any accessorial already present on the original bill is not selectable for the adjustment; only genuinely new charges can be added this way.
Recalculate Commissions
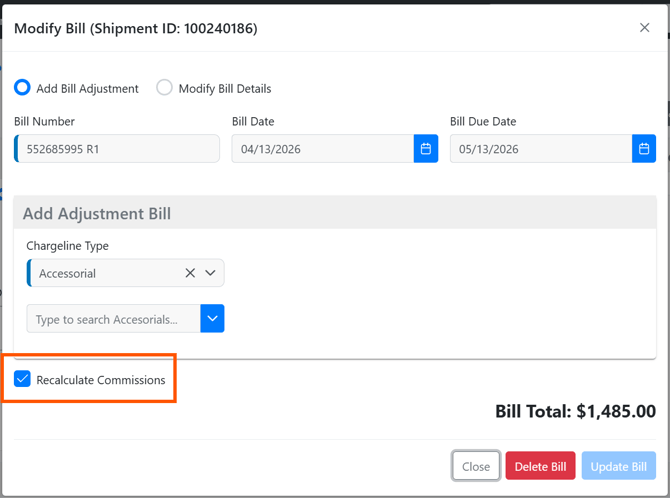
You can toggle Recalculate Commissions on when adding the adjustment:
- If the shipment commission has NOT yet been approved, the commission is recalculated in place using the new total.
- If the commission has already been approved, a separate commission record is generated to cover the delta so the existing approval is not overwritten.
Include Invoice Revision (cross-link to the customer invoice)
If the charge being added should also appear on the customer invoice, enable Include Invoice Revision. This simultaneously creates a matching invoice revision so the sell side is adjusted alongside the buy side. For more on invoice revisions, see https://learn.tai-software.com/knowledge/revise-invoice.
Modify Bill Details
Use this option to correct fields on the original bill itself.
Editable fields
- Amount
- Bill Number
- Bill Date
- Bill Due Date
When NOT to use this option
- If the bill has already been synced to an external accounting system such as QuickBooks Online. Changes made here do NOT re-sync, and the external system will drift out of alignment. Use Add Bill Adjustment instead so both systems see a clean additive change.
Delete Bill
Use this option to permanently remove a bill from the shipment.
⚠ IMPORTANT — This action cannot be undone.
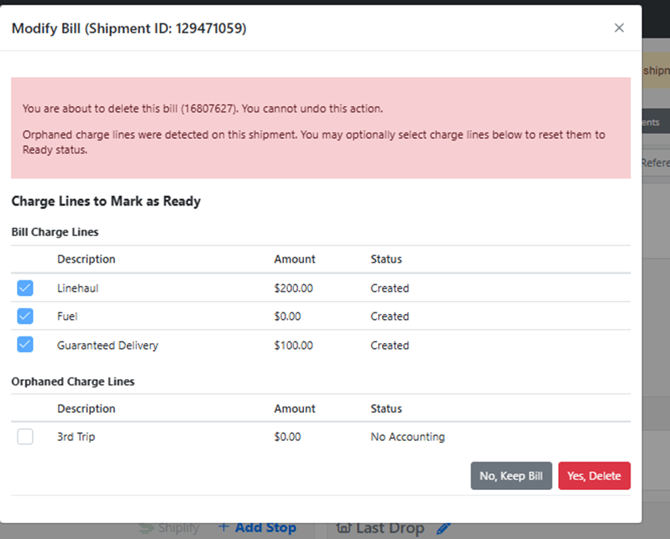
Before the deletion completes, the system shows a preview modal with the charge lines that will be affected. Review them carefully before confirming.
What you will see
Bill Charge Lines: the charge lines that belong to this bill. These will be reset to Ready status when the bill is deleted. The checkboxes are pre-selected and cannot be changed.
Orphaned Charge Lines: buy-side charge lines on the shipment that will be left without a bill after deletion. These are not deleted automatically. Each line has an optional checkbox:
Unchecked (default): the line will remain in its current status.
Checked: the line will be reset to Ready status after the bill is deleted.
What are orphaned charge lines?
- Orphaned charge lines are buy-side lines that were automatically added to the shipment when an invoice revision was created. When a revision is created, a new charge line is added at the shipment level. If a bill already existed at that point, the sell side reflects the new line with a status of Created (tied to the invoice revision), but the corresponding buy-side line has no bill to attach to, so it lands in No Accounting status instead.
- These lines are not visible or actionable through normal billing because their No Accounting status blocks them from being picked up in a new bill. Deleting the original bill gives you the option to reset them to Ready, which unblocks them and makes them available to be included in a new bill.
If no orphaned charge lines exist on the shipment, the Orphaned Charge Lines table will not appear.
Steps
- Pull up the shipment and click Accounting.
- Select Modify Bill.
- Choose Delete Bill.
- Review the Bill Charge Lines and Orphaned Charge Lines tables.
- Adjust the orphaned line selections as needed.
- Click Yes, Delete to confirm, or No, Keep Bill to exit without making any changes.
Result
The bill is deleted. Any orphaned charge lines you left checked are reset to Ready status and are available to be included in a new bill. Any you unchecked remain in No Accounting status.
Troubleshooting
- If a revision bill is not appearing under the original shipment, confirm the adjustment was saved and look for a bill with an
R1(or higher) suffix. Revisions do not replace the original row; they appear alongside it. - If commissions did not recalculate, confirm the Recalculate Commissions toggle was on at the time of save and that a commission exists for the shipment.
- If Modify Bill Details is unavailable, the bill may already be in a state that prevents direct edits. Add a bill adjustment instead.
- When a Modify Bill Details change was made after sync and the external accounting system is now out of alignment, reconcile manually in the external system and consider creating an adjustment record there as well.
- For carriers with factoring or Quick Pay arrangements, remember that revision bills inherit the original vendor assignment and can affect downstream payment processing. Verify the vendor on the revision matches your intent.