Quick Reference Video Summary
- This screen will allow you to pay all bills that have been approved for carriers, organizations, and sales reps
- Checking off a shipment and selecting 'Register Payment' will show you a popup/modal to register the payment details; from this screen you can mark what type of payment it is, and add a check memo
- If you have a Quickbooks Integration with our system make sure you check 'Print Check Later,' so that you can get the check number back into the system from Quickbooks Online after printing the check from Quickbooks
- After you register the payment in the system an actual check will sync over to QB online; in QB online you will print this check and assign it a check number; the check number will eventually sync back to the system
- Clicking 'Save Payment' from this modal will mark the bill as paid and move it off this screen
- If you have a Quickbooks Integration with our system make sure you check 'Print Check Later,' so that you can get the check number back into the system from Quickbooks Online after printing the check from Quickbooks
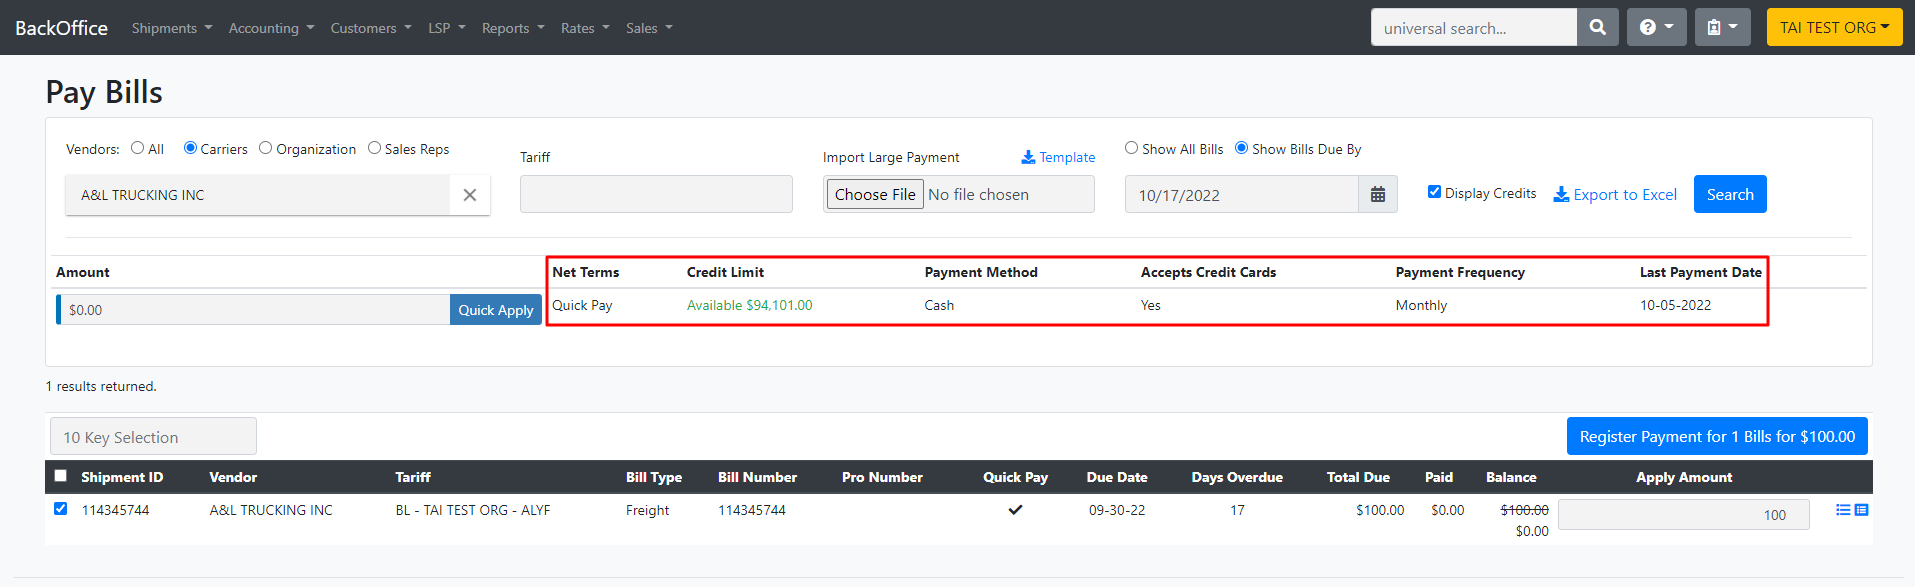
- In the main section, there is a "Display credits" check box. By default, this option is checked and will show any existing credits that appear on the page. The purpose of this feature is to allow the user to quickly process active bills and manage any available credits after the fact.

The system will not allow registering a bill payment with a negative value. However, if you are registering payments for multiple bills and the total amount is positive, the system will permit it.

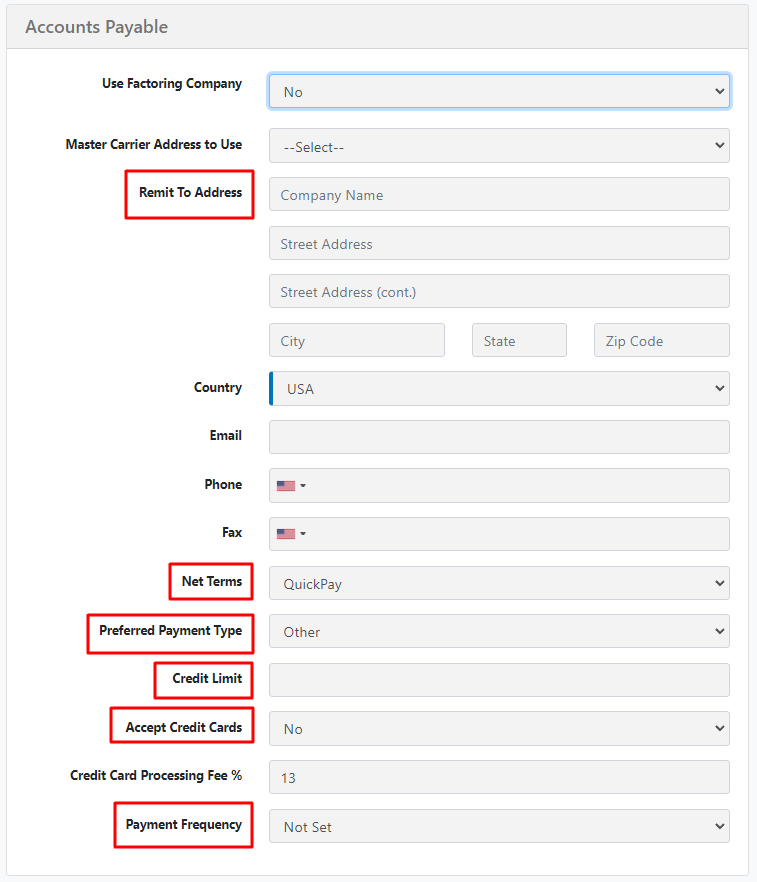
AP Data From Carrier Profile
We will give a full view of the carrier's accounts payable specifications so you can consider this before you pay a bill. The information displayed is what you set in the broker carrier's profile.
- Net Terms
- Credit Limit
- Payment Method
- Accepts Credit Cards
-
Payment Frequency
-
Last Payment Date