How to Upload Carriers
The purpose of this article is to describe the process of uploading carriers in to the TMS. These Carrier will be available on the customers LSP Carrier List.
Template
-
To download the template, go to the main dashboard, and at the top, click LSP.
- Click Onboarding Guide
-
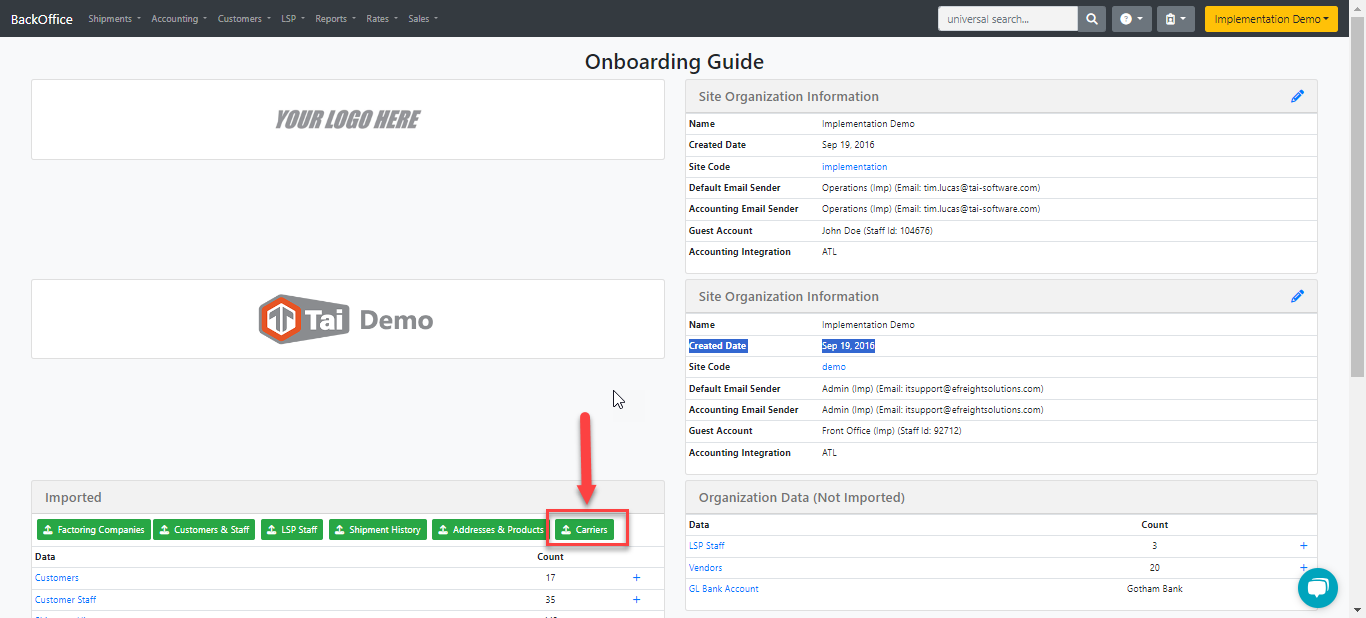
Under Imported, click the Carriers option.
- Click the Template button at the bottom of the modal, this will download the Excel file that is needed to be imported correctly.
Note: You will need TMS Admin permissions to upload information in the Onboarding Guide. Contact Tai for uploads.

Verification Checklist
The carrier template has two sheets, each of which has some mandatory fields, here are some tips that will help you with the process of importing.
Carrier Template
This sheet will add the carriers to the LSP > Carriers of the Broker, the mandatory fields are Carrier Identifier, Requires 1099 and Accepts Credit Card.
- Carrier Identifier: Make sure you include both the MC and DOT numbers if the carrier has both, as the template matches to master carriers based on both. If the carrier has NO MC, leave it blank and it will be matched to master carriers with a matching DOT and a NULL MC. If providing an MC#, ensure it has at least six digits by adding any missing leading zeros.
- Supported Shipment Types: Select from LTL, Cartage, Domestic Freight, Drayage, or Truckload. Make sure you spell them in that specific format. Avoid abbreviations because they will cause the upload to fail.
Always add Cartage as a ship type, plus the Ship type the customer desires, this way we will allow them to use the same carrier on different transit legs.
-
Requires 1099: Value equals "True" or "False".
-
Accepts Credit Card: Value equals "True" or "False".
- Net Terms: Value equals 7, 15, 30, or 45.
-
Payment Frequency: Value equals "Not Set", "Weekly", "Monthly"
-
Preferred Payment Type: Value equals "Cash", "Credit", "CreditCard", "ACH", "Other"
-
Address information will be pulled directly from the physical address of the carrier master.
-
Preferred states: 1 for Inbound, 2 for Outbound, and 3 for both. If 0 or left blank system will default to None.
- Factoring Company ID: If the carrier uses a factoring company use the factoring company importer first and then enter the factoring company's ID under LSP > Factoring Companies in TMS.
Contact Template
This sheet will add the contacts of the carriers to the LSP > Carriers of the Broker, which is not mandatory so the sheet can be left blank, the mandatory fields are Carrier Identifier and Contact Name.
- Carrier Identifier, make sure you have either the MC or DOT number, as the template is going to take just one of them and when uploading you will select which it is with the toggle.
If it is an MC#, ensure they have at least six digits, adding at the beginning the missing zeros. - Contact type: This can equal Driver, Terminal, Dispatcher, Airport, Sales, Accounting, or other.
- The State must be limited to 2 alpha characters.
- Make sure Zip codes are entered as text with leading 0s when necessary. "07761" instead of "7761" (consider that Excel will remove leading 0s if you do not format the cell as text).
-
Remember that the system will allow you to have zip codes with no less than five characters but a maximum of 7.
-
-
Country is a Mandatory field, ensure you add USA or Canada in that exact format. For other Countries, make sure to spell the name correctly. Avoid abbreviations in both cases because that will cause the upload to fail. Remember you can always check the TMS and see how this name shows up there.
- All Emails must be entered in a valid format or left blank. Invalid emails in any of the following fields will cause a failure to import.
- Airport Serviced: Any airport code such as LAX, ADK, JFK, DFL, etc.
- Make sure none of the columns or cells have special formatting or characters.