What this does
Margin Management lets you set how much margin the system adds to freight cost for a customer, sub-organization, tariff, or pricing plan. You control the calculation type, the minimum and maximum, and the criteria that decide which shipments a margin applies to.
- Apply margins consistently across customers, sub-organizations, tariffs, and reusable pricing plans.
- Limit a margin to shipments that meet specific criteria such as cost, weight, handling unit, average class, or custom shipment values.
- Price insurance-based charges by tying margins to a shipment's declared value and deductible.
User Guide
How to create a margin
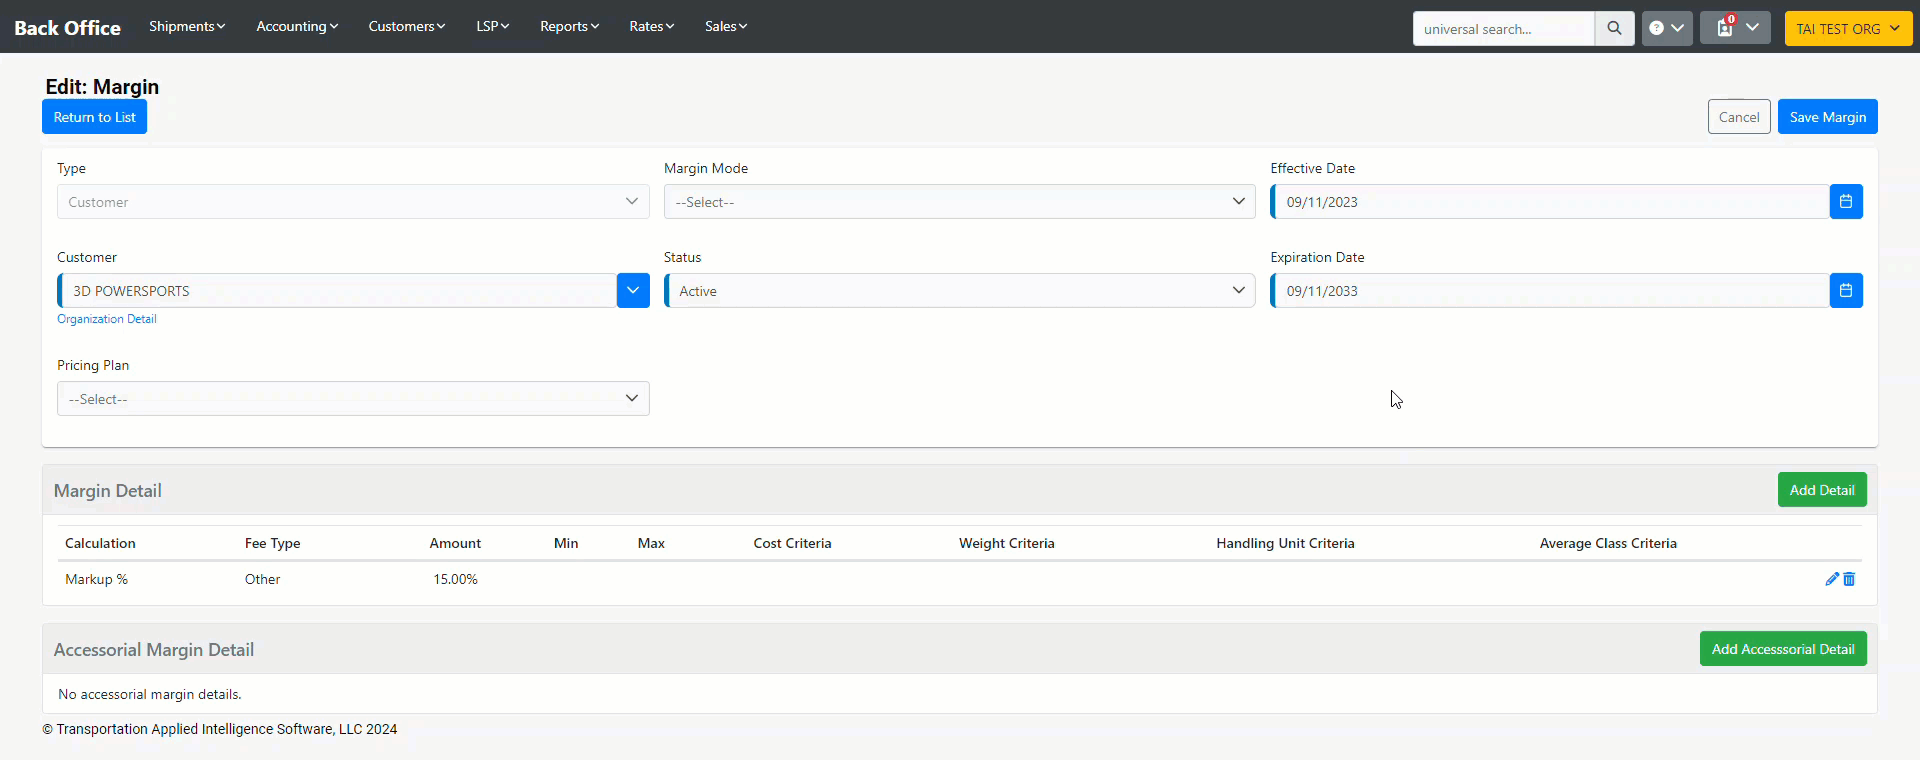
You can create a margin for customers, organizations (only sub-orgs), tariffs, and price plans. The process is the same for customers, organizations, and tariffs; this example focuses on customers.
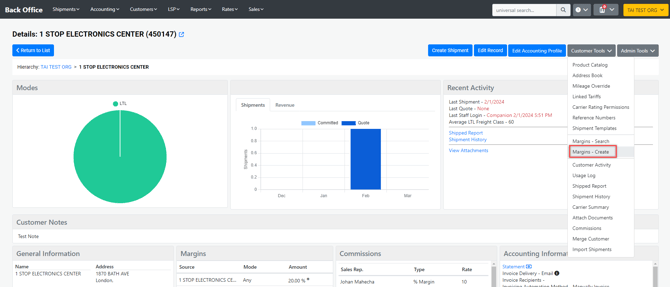
- Navigate to the Customer Tools drop-down in a customer's profile and select Create a Margin.
- The screen automatically selects the customer you accessed the page from.
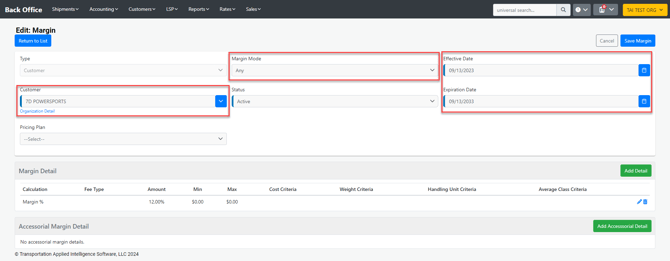
- Choose the shipment mode and set the Effective and Expiration dates.
Important: Margin Effective and Expiration dates are evaluated using UTC, not your local time zone. For example, if a margin is set to expire today, it remains valid until the end of that day in UTC, which may be earlier than 11:59 PM in your local time zone. Consider the UTC cutoff when configuring expiration dates to avoid unexpected rating behavior.
Note: The expiration status shown in the margin list may be based on your local time zone, while the rating engine evaluates expiration using UTC. Around the expiration boundary, a margin may still appear active in the list even though it is no longer applied during rating.
How to set the margin details
Where to go: On the Create a Margin screen, fill out the margin details after setting the mode and dates.
Select the calculation type of the margin you are creating:
- CWT: Hundredweight.
- Flat: Fixed fee.
- Pieces: Dollar amount per piece in the shipment commodity description.
- Markup %: The system marks up the total freight cost by the percentage set.
- Margin %: The system marks up the freight to whatever amount it needs to be to meet the margin percentage set.

You can set a minimum and maximum value to guarantee a specific dollar amount is met without exceeding a certain limit.
The system can also calculate an accessorial fee using the same calculation types and criteria described here.
To complete your margin, click Save & Add Details at the top right corner and then click Save Margin.
We thoroughly recommend testing margins before releasing them to customers.
How to limit a margin with criteria
Where to go: In the margin details on the Create a Margin screen, set the criteria fields.
Criteria make a margin apply only to shipments that match the values you set. You can customize:
- Cost, Weight, Handling Unit, and Average Class — the margin applies only to shipments that fall within the ranges you set.
- Custom 1 and Custom 2 — flexible criteria you can map to a shipment value, each with its own minimum and maximum. Custom criteria are a growing framework; more mapping options will be added over time, and today they cover insurance-based pricing (see below).
How to price insurance with custom criteria
Where to go: On the margin profile, map the Custom 1 and Custom 2 criteria; then set their Min/Max in the margin details.
Custom criteria let you build margins that respond to values on the shipment instead of just its cost or weight. On the margin profile you pick what each custom slot maps to. This is designed to expand — additional mapping options are planned for future releases — and the options available today are:
- Insured Value — the shipment's insured (declared) value.
- Insurance Deductible — the shipment's deductible amount.
For insurance pricing, you would typically map Custom 1 to Insured Value and Custom 2 to Insurance Deductible. Once mapped, set a minimum and maximum on each custom criterion so the margin applies only to shipments whose values fall in those ranges — letting you charge different insurance pricing for, say, high-declared-value loads versus standard ones.
Note: Custom criteria currently apply to insurance pricing on Supplemental Insurance Provider margins. If you don't see Custom 1 / Custom 2, this capability may not yet be enabled for your account — contact support.
Tips & best practices
- Test any margin — especially one using custom insurance criteria — before releasing it to customers.
- Set both a minimum and a maximum on custom criteria so a margin doesn't apply to shipments outside the range you intend.
- Remember expiration is evaluated in UTC when scheduling insurance-pricing margins around a boundary date.
Pricing Plans
Adding margin can be easy if you create a custom pricing plan. The system lets you categorize plans by service level (for example, Bronze, Silver, Gold), and you can use any name you prefer.
How to create a pricing plan
- Navigate to the Rates tab in the back office and select Margins.
- Locate the option to Add a New Margin at the top right corner of the screen.
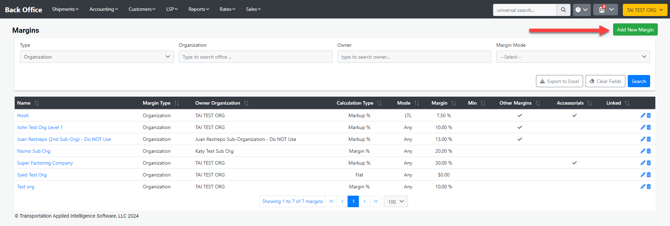
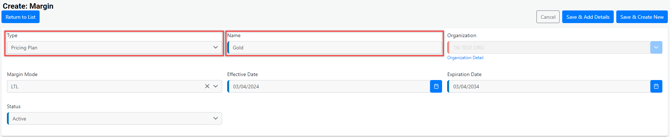
- Change the Type to Pricing Plan and add a name.
- Include the margin and accessorial margin details; this becomes the criteria for your pricing plan.
How to add a pricing plan to a customer
Customer creation: When creating a customer, under margin, you can select an existing pricing plan.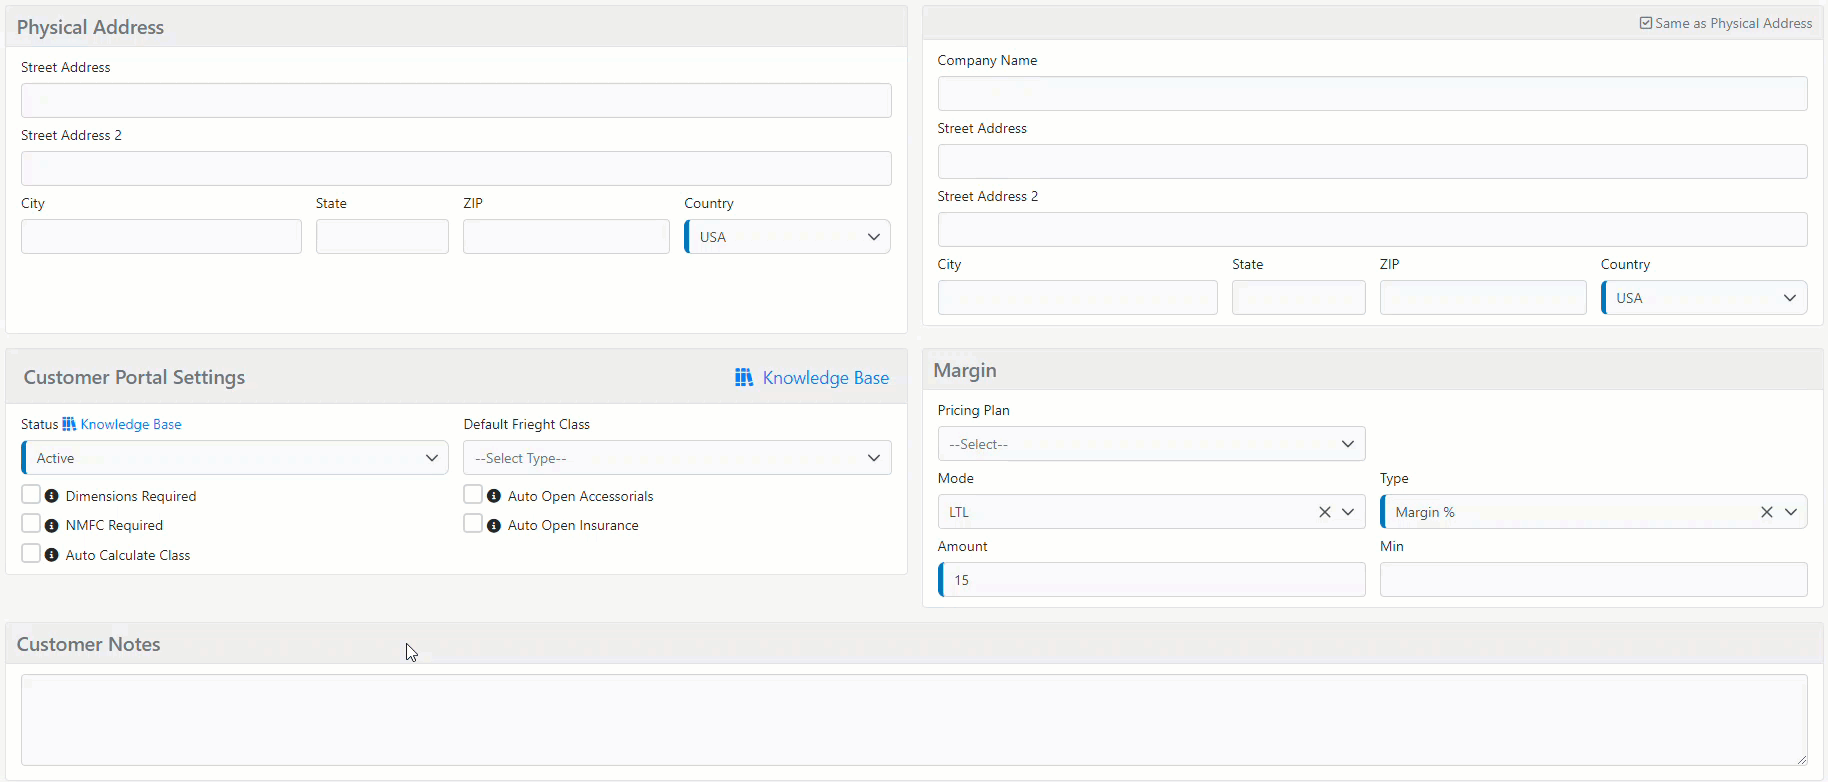
Update a customer margin to a pricing plan:
- Go to the customer's profile, click Customer Tools, and select Margin Search.
- Click the blue pencil to the right to edit the margin.
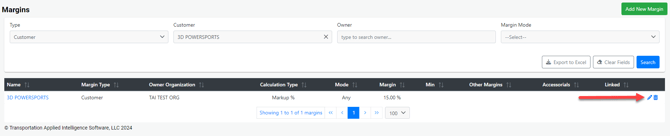
- Select the pricing plan option to display the pricing plans you have set up
Updating the pricing plan will apply the changes to all customers using that specific plan.
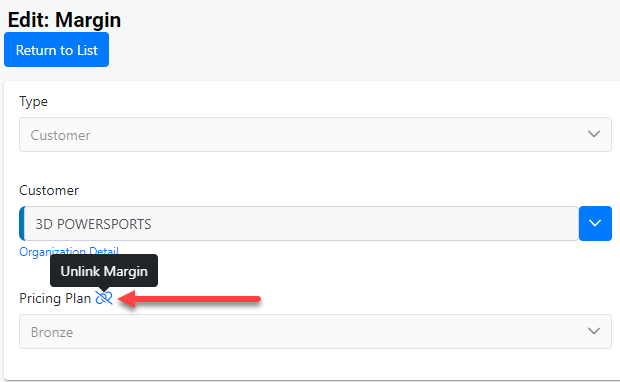
If you choose a pricing plan, you won't be able to edit the margin. To apply a margin different from the ones in your pricing plan, unlink the pricing plan — this lets you update the margin details again.
Frequently asked questions
What are Custom 1 and Custom 2 criteria on a margin?
They are flexible margin criteria you can map to a shipment value, each with its own minimum and maximum. They're part of a framework that will grow over time; the mapping options available today are Insured Value and Insurance Deductible, used for insurance pricing.
Will more custom mapping options be added?
Yes. Custom criteria were built to be extensible. Insured Value and Insurance Deductible are the first options; additional shipment values are planned for future releases.
Why don't I see Custom criteria on my margin details?
Custom criteria are a newer capability tied to insurance pricing and may not yet be enabled for your account. Contact support to confirm availability.
Can I set only a minimum or only a maximum on a custom criterion?
You can, but we recommend setting both so the margin applies only to shipments whose declared value and deductible fall inside the range you intend.
If something doesn't work
- If a margin isn't applying, confirm the shipment falls within every criterion range you set — including Custom 1 and Custom 2 if used.
- If an insurance-pricing margin doesn't apply, verify the margin mode and that the shipment actually carries a declared value and deductible.
- If a margin appears active in the list but isn't applied during rating, check the Effective/Expiration dates against the UTC cutoff.
- If Custom criteria don't appear at all, or behavior still looks wrong after these checks, contact support.