Shipment Status Updates
We've made some changes to the Shipment Status workflows in the TMS and we think you're going to love them. We've made these changes for two primary reasons.
- Shipment Statuses are meant to be Customer-Facing. This means simplifying the status names themselves, reducing the number of statuses available, and making our shipment statuses respect the entire shipment (not just the linehaul carrier). You've already seen this name change in action for a few releases when we changed some of the status names and now you can see our improved Shipment Status List below.
- Introducing Carrier-Facing Statuses. If you only have a linehaul carrier on a shipment, then not much has changed. A single carrier status will translate directly into a shipment status just like before; however, when you have multiple carriers, we'll track each carrier separately. This means when the linehaul carrier hands the shipment off to your final mile delivery carrier, the shipment will still show In Transit even though the linehaul carrier will show Delivered.Shipment Alerts.
Full details can be found here: Shipment Status Updates (Full)
Shipment Alerts
Shipment alerts are applied when something of operational importance applies to a shipment. These alerts are visible on the dashboards, the shipment search pages, the shipment detail pages, and the status modal. Many of these alerts are applied to shipments automatically and others can be added manually. The alerts that you'll see on a shipment will fall into three primary categories.
- Exceptions
- Secondary Shipment Statuses
- Important Shipment Attributes
Some alerts are meant to exist on a shipment for its entire lifecycle and others to be applied and then later resolved. Alerts are a great way to improve operational efficiency and add an additional layer of reporting. Let's take a look at some examples.
Full details can be found here: Shipment Alerts (Full)
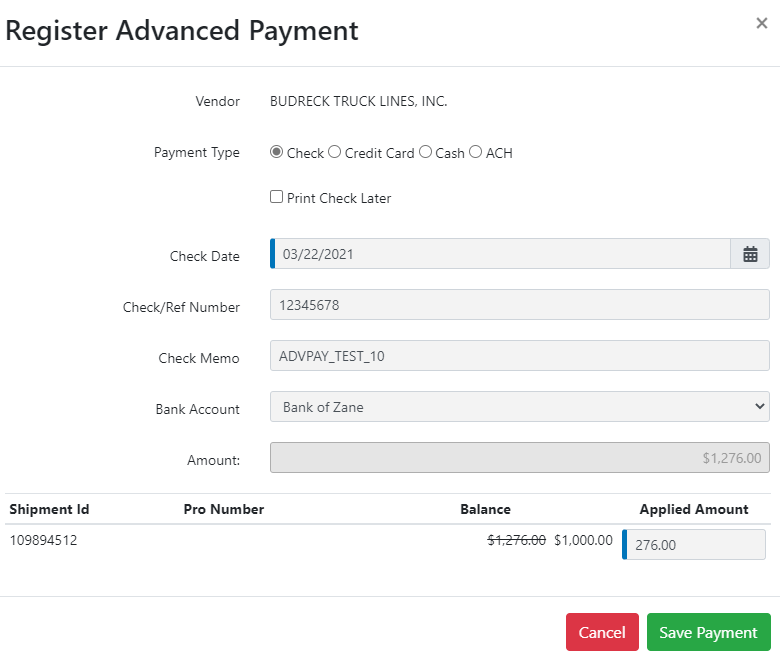
Truckload Advance Payment Workflow
The purpose of this item is to add functionality to allow for making advance payments to carriers for TL shipments. This will allow us to build integrations with Truckstop Pay, ComData, and Triumph Pay. These services are not required but will allow the payment process to flow easily. The workflow for this function is similar to the Pay Bills workflow, however, this can now be done without having previously approved a bill.A big change is to create a workflow for creating a bill payment without creating a Bill. the reason for this is that an advance payment happens right when the shipment is being dispatched. That means we have no idea what the future bill will look like. This mostly happens for fuel advances.
Full details can be found here: Truckload Advance Pay (Full)
 Truckstop Pay

We are still finalizing the integration with the folks over at Truckstop, however, this integration will work seamlessly with the new Truckload Advance Payment Workflow. Truckstop Pay is anticipated to go live on April 5, 2021.
FourKites Integration

This is a RESTful API integration that will work with Tai TMS’s existing Shipment Location History functionality. FourKites is now available as Shipment Tracker. Tai TMS can Create, Update, and Delete loads within FourKites application. Callbacks will pull back relevant information for display in the Shipment Location History modal.
Macropoint Enhancements
Macropoint has some new functions that we've connected to in order to enhance the user experience.
- CustomerUDFData - With this function, we can map a reference field to a field that can be displayed in Macropoint. For example, if you have a customer who wants to reference the salesperson or PO Number or any text field, this can be mapped and passed into the Macropoint Control Tower view.
- StopSequencingRequired - If multi-stop (true), can submit the stops in the order needed.
- Note, must hit in the specific order for the geofence to kick off.
- GeofenceInMiles - Can send the # of miles / by default 5 miles in / 5 miles out. Can make it unique per stop. Ie 1st stop / 1 mile, 2nd stop 5 miles
- EmailCopiesOfUpdatesTo - can email copies of updates to customers.
- ScheduleAlerts - change the number of driving hours (defaults to 11) useable if multi drivers
ELD Support
Send CarrierID this maps to a carrier on their side (Mapping Synonym) pulls data from the unit. If the connection to the truck fails, will try the mobile and kick off a msg to the driver. Vehicle ID goes first.
- For this particular item, we'll need to investigate a bit to make sure we can send them the required information that will work within Macropoints workflow in their system.
Trucker Tools - Covered / Improvements / Enhancements
Numerous enhancements for Trucker Tools
Insurance - Void Certificate
Users of our popular Supplemental Insurance program can now submit a Void Certificate request directly from the Shipment Detail screen.

Carrier Status Request Email
With the Shipment Status Request email that is sent from the Truckload Shipment Search (Bulk Operations), we are now adding a function that will allow a Truckload Carrier dispatcher or driver to update a shipment from a carrier portal page.
The page allows for the following information based on transit leg status:
- Dispatched
- Buttons: Pickup Completed, Not Completed
- Actual pickup date/time
- Current Location
- We will check if the browser will give the location and if so, update accordingly
- The driver can type in the city, then use type ahead to pick the city-state from our zip code DB.
- In transit
- Buttons: In transit, Delivered
- Current location - same as above
- Actual delivery date/time
- Delivered
- Shows a message saying that the shipment is delivered (no update available)
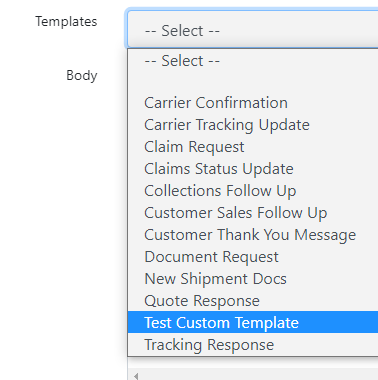
Email Automation - Custom Templates
Users can now add up to three custom content templates. Each site code has the ability to add up to three completely custom content templates for Emails. These templates work like most other content templates and can be created using plain text, HTML formatting, and system tags. They are available in the Send Messages modal and there are a few key differences with these templates that can affect how they are used.
Full details can be found here: Custom Email Templates
This can be added by going to:
- LSP --> Content Templates.
- In the content template, the following has to be added in the HTML Source: (Tools --> Source Code)
- After the code snippet has been added, text can be added to the Content Template.
- The name entered in the Custom Template Name section is what will appear in the Send Message template dropdown.